Recurring/Preventative Maintenance Work Orders
Overview
Auto Recurring Work Orders are designed for:
→ Preventative maintenance.
→ Scheduled service.
→ Repeating work at set intervals.
Work orders can automatically recur based on the schedule you choose.
Set Up Auto Recurring Work Orders
Create a New Contract
1. Go to Contracts from the menu.
2. Select Create Contract (bottom-right corner).
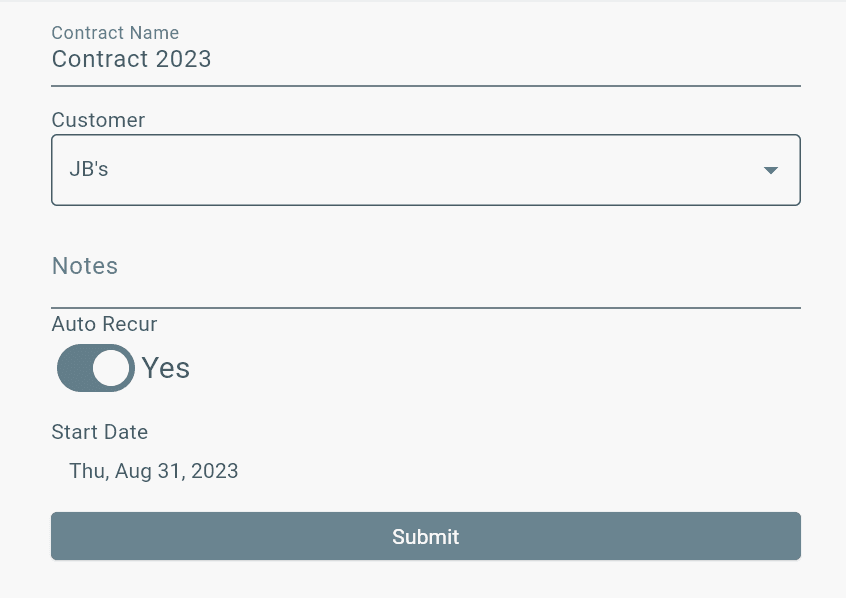
3. Fill out the required fields.
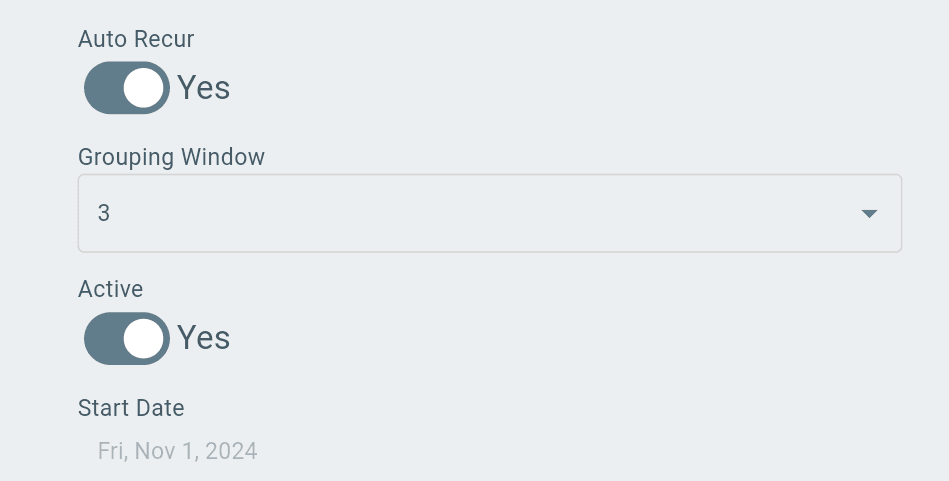
4. Turn Auto Recur ON.
5. Select the start date.
6. Select Submit.
Use an Existing Contract
1. Open the Contract.
2. Select the Edit icon in the top-right corner.
3. Turn Auto Recur ON.
4. Save changes.
→ Auto Recurring settings can be enabled when creating a new Contract or editing an existing one.
2. Open the Contract from the Contract table.
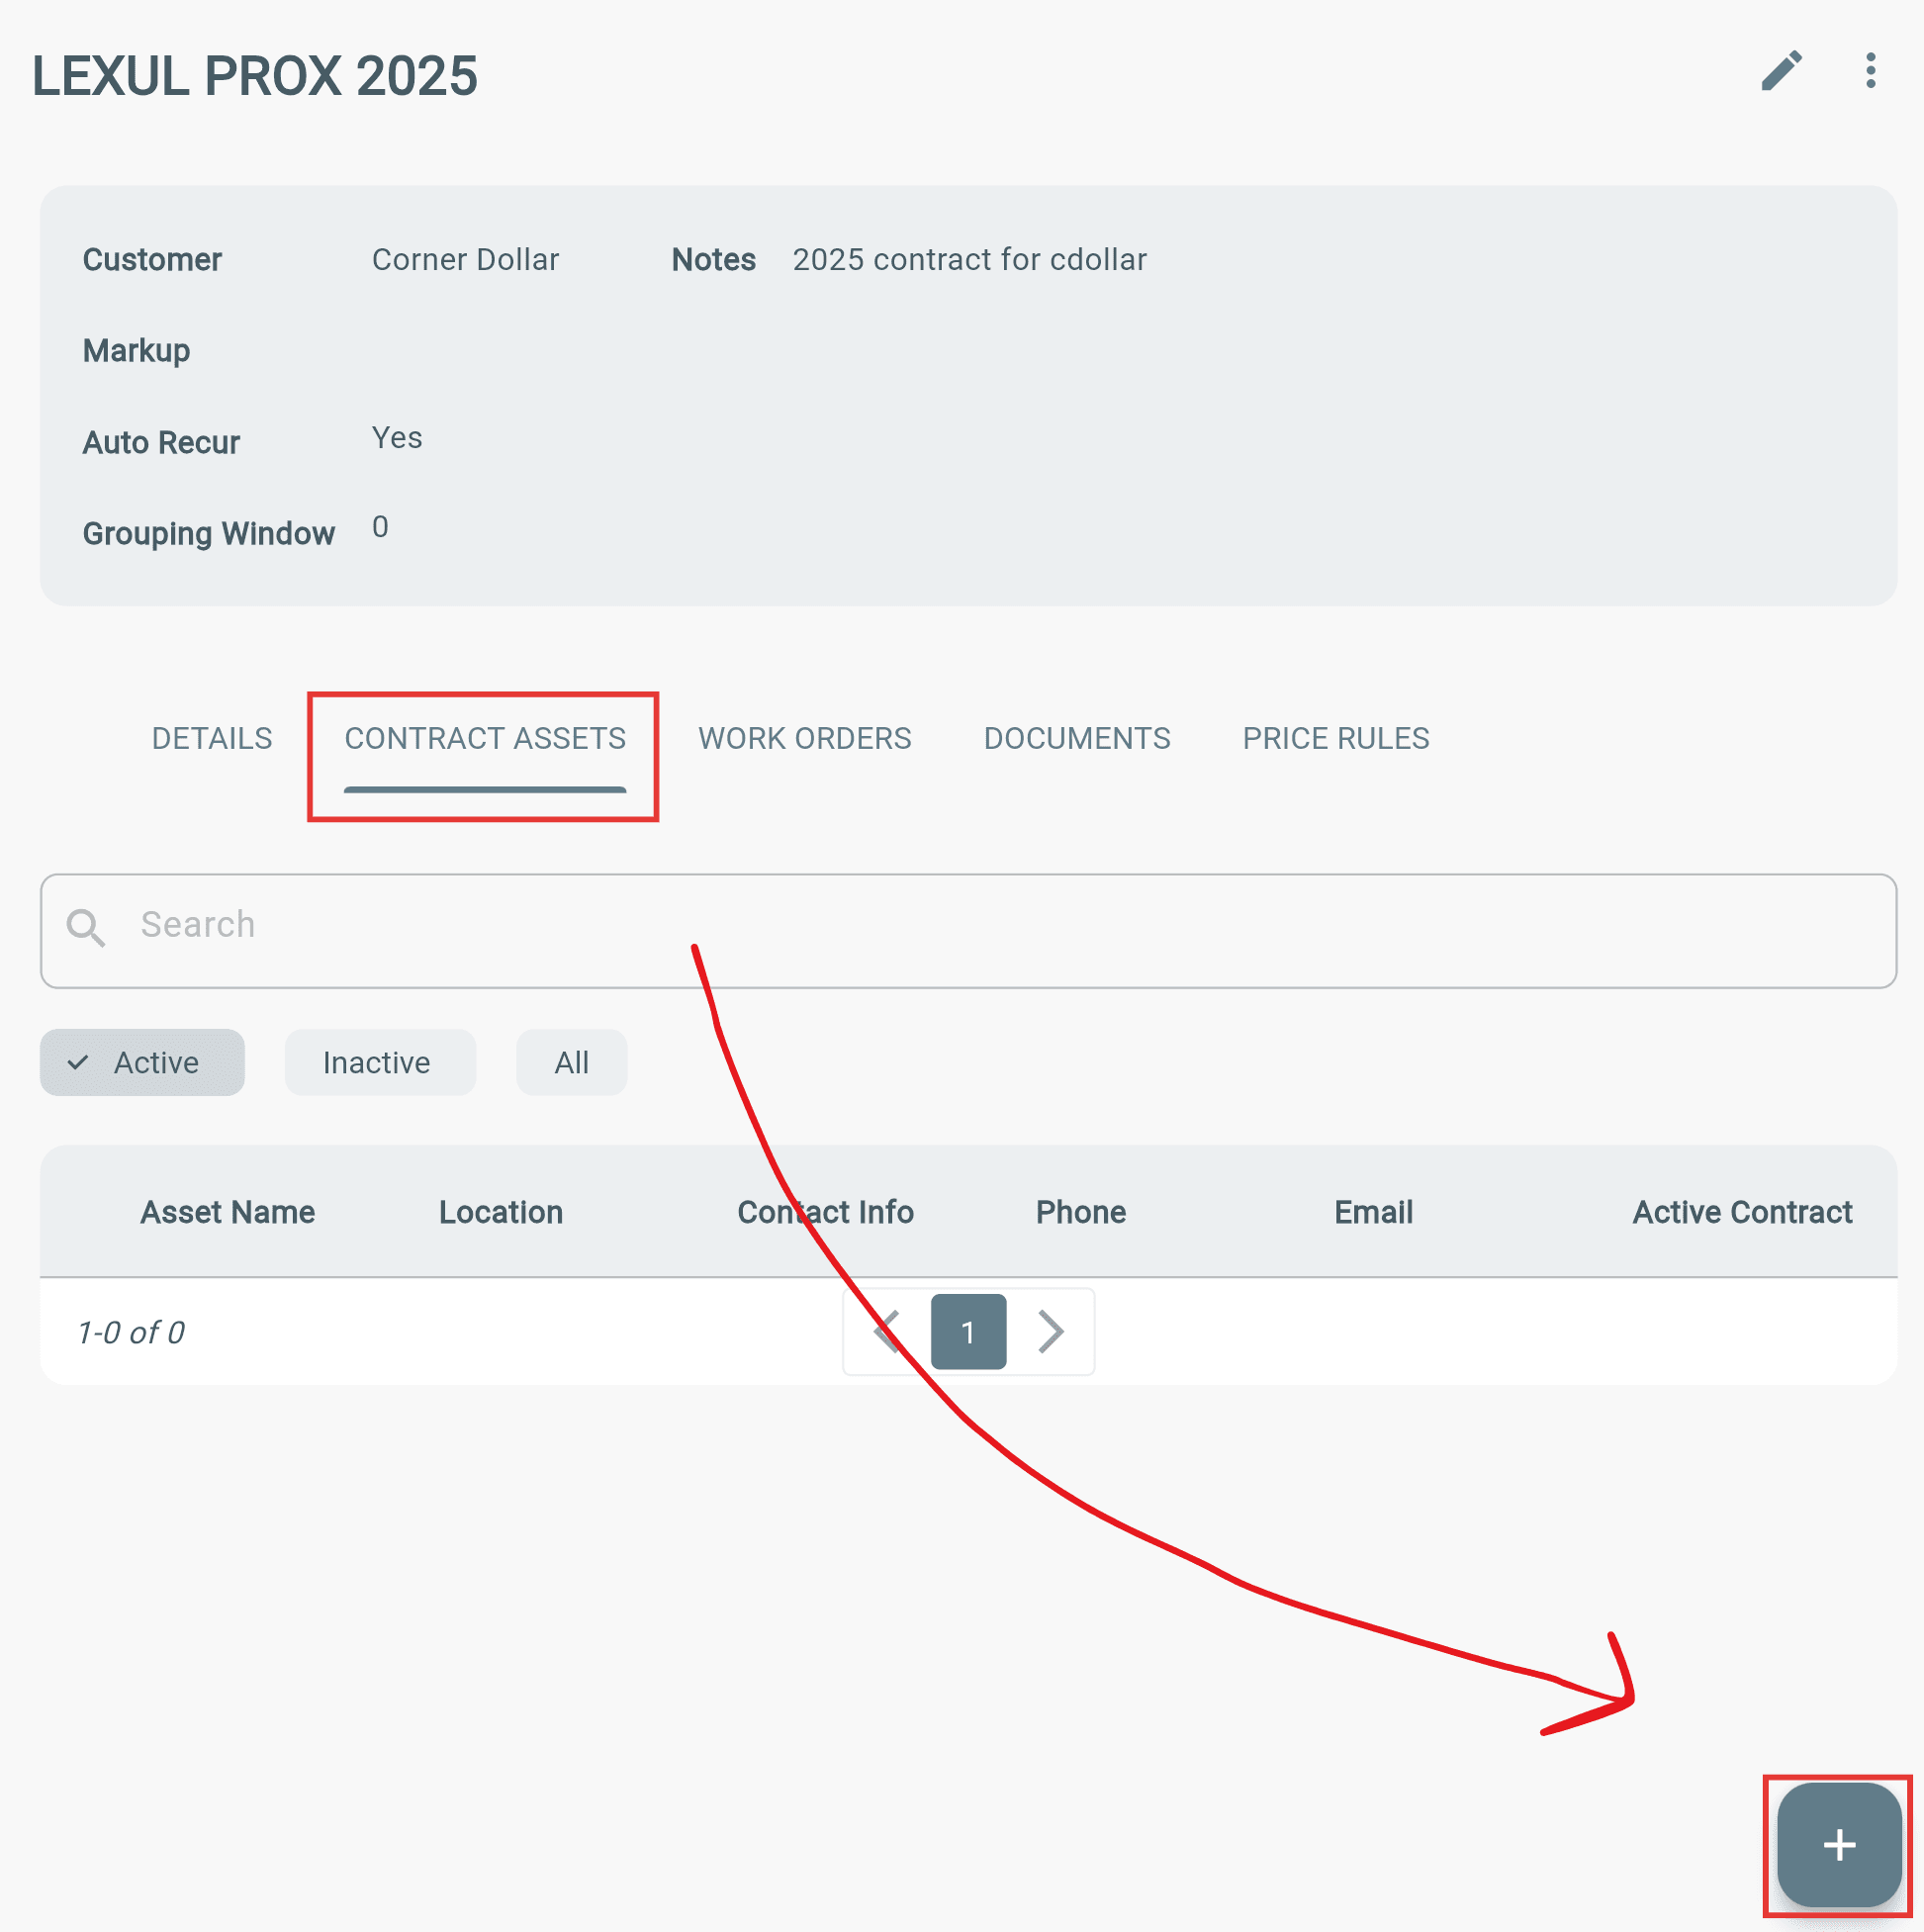
→ Select the blue Action (+) button.
→ Add Contract Assets by choosing:
- Asset List — Select existing Assets.
- CSV Upload — Import multiple Assets.
3. Create the Contract Template:
→ Select Create Template in the top-right corner.
→ Choose the needed information from the dropdowns.
→ Select Submit.
→ Add all required Template details.
On the Service tab:
→ Select the blue Action (+) button.
→ Add Services.
→ Add Parts under each Service using + Add Parts.
Parts will be attached to the selected Service.

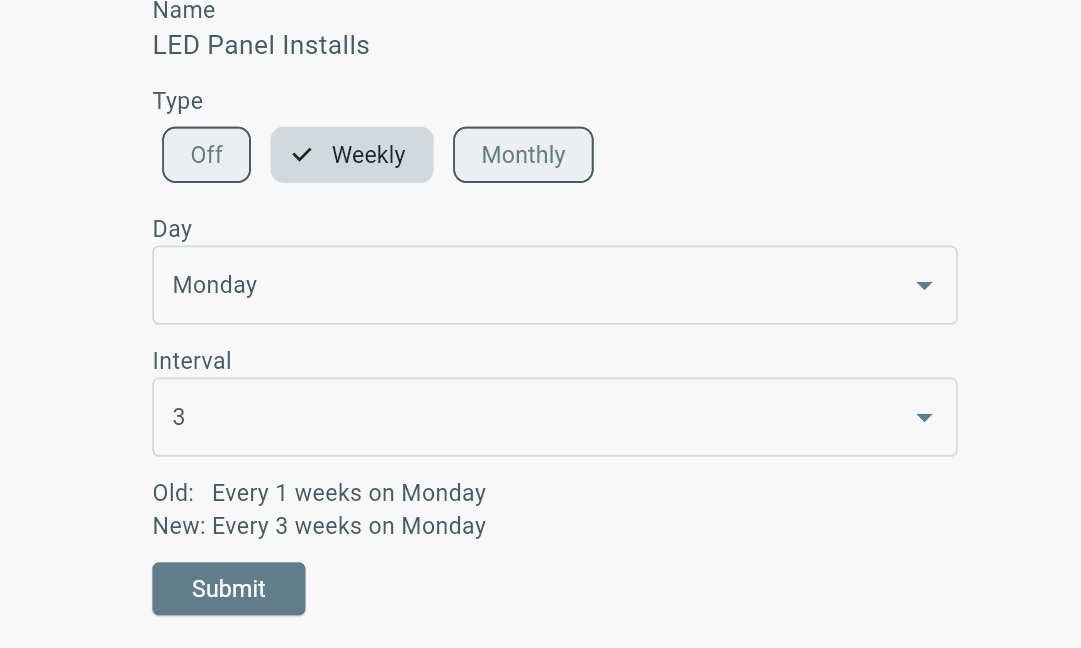
4. Set up recurring schedules:
→ Find Recurring Settings.
→ Choose the required intervals and scheduled times for each Service.
→ Select Submit.
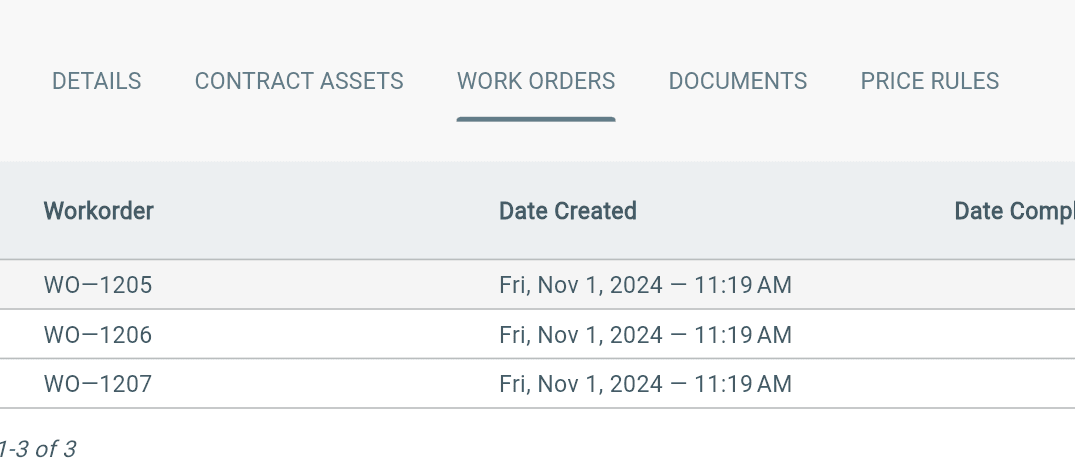
→ Work orders will automatically be created for each Service on the next scheduled recurring date.

These newly generated work orders will show on the individual contract/project page under the “WORK ORDERS” tab.
Grouping Window
The Grouping Window combines recurring Services into the same work order when they are scheduled close together.
This applies only to:
→ Weekly recurring Services.
→ Monthly recurring Services.
Example
A Service is scheduled:
→ Monthly on the 1st day of each month.
→ Every other week on Monday.
If the 1st of the month falls on a Tuesday:
→ A 1-day or greater Grouping Window will combine both Services into one work order.
This helps reduce duplicate work orders and keeps nearby scheduled work together.
Cloning a Contract Template
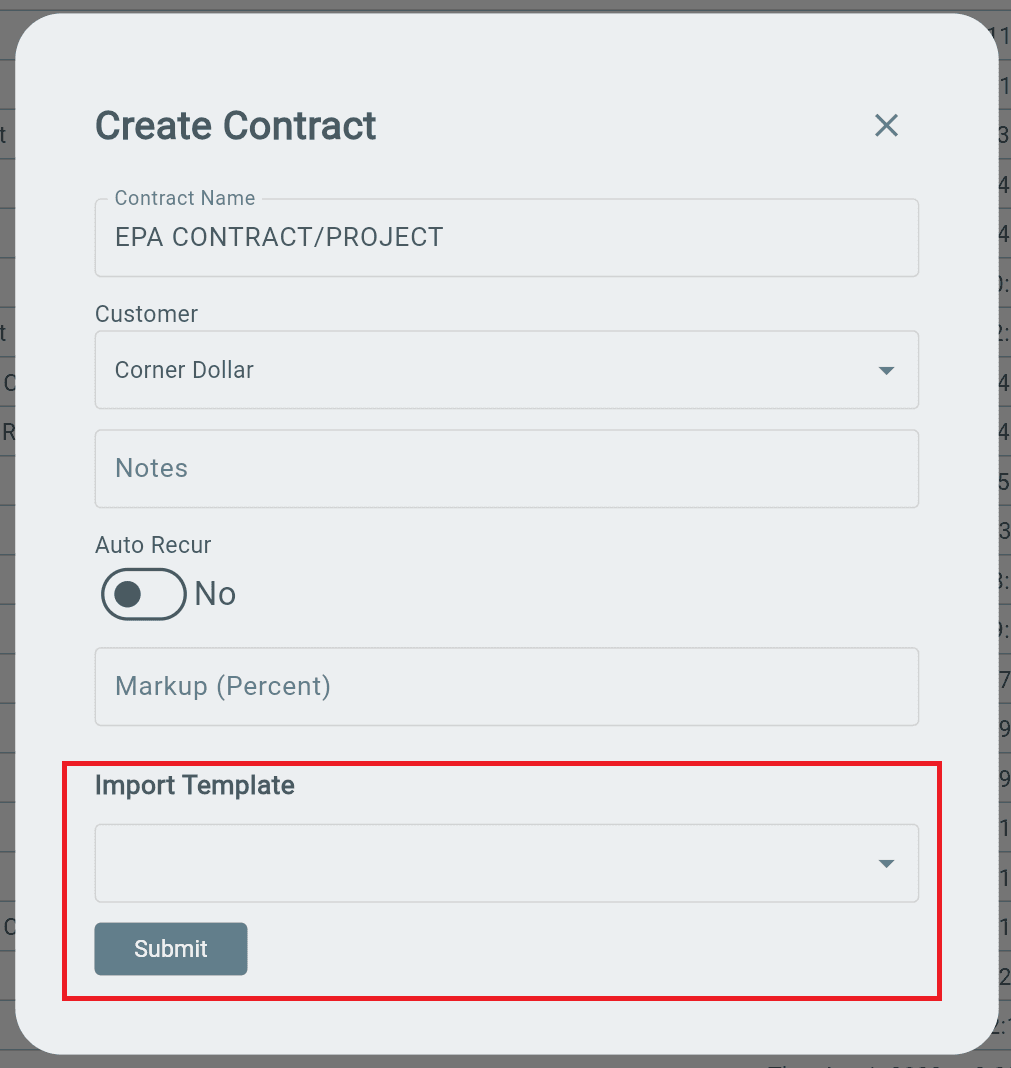
1. Go to Contracts.
2. Select Create Contract.
3. Find Import Template.
4. Select a previously created Contract Template.
→ The selected template will be applied to the new Contract.
Grouped Contract Services
Overview
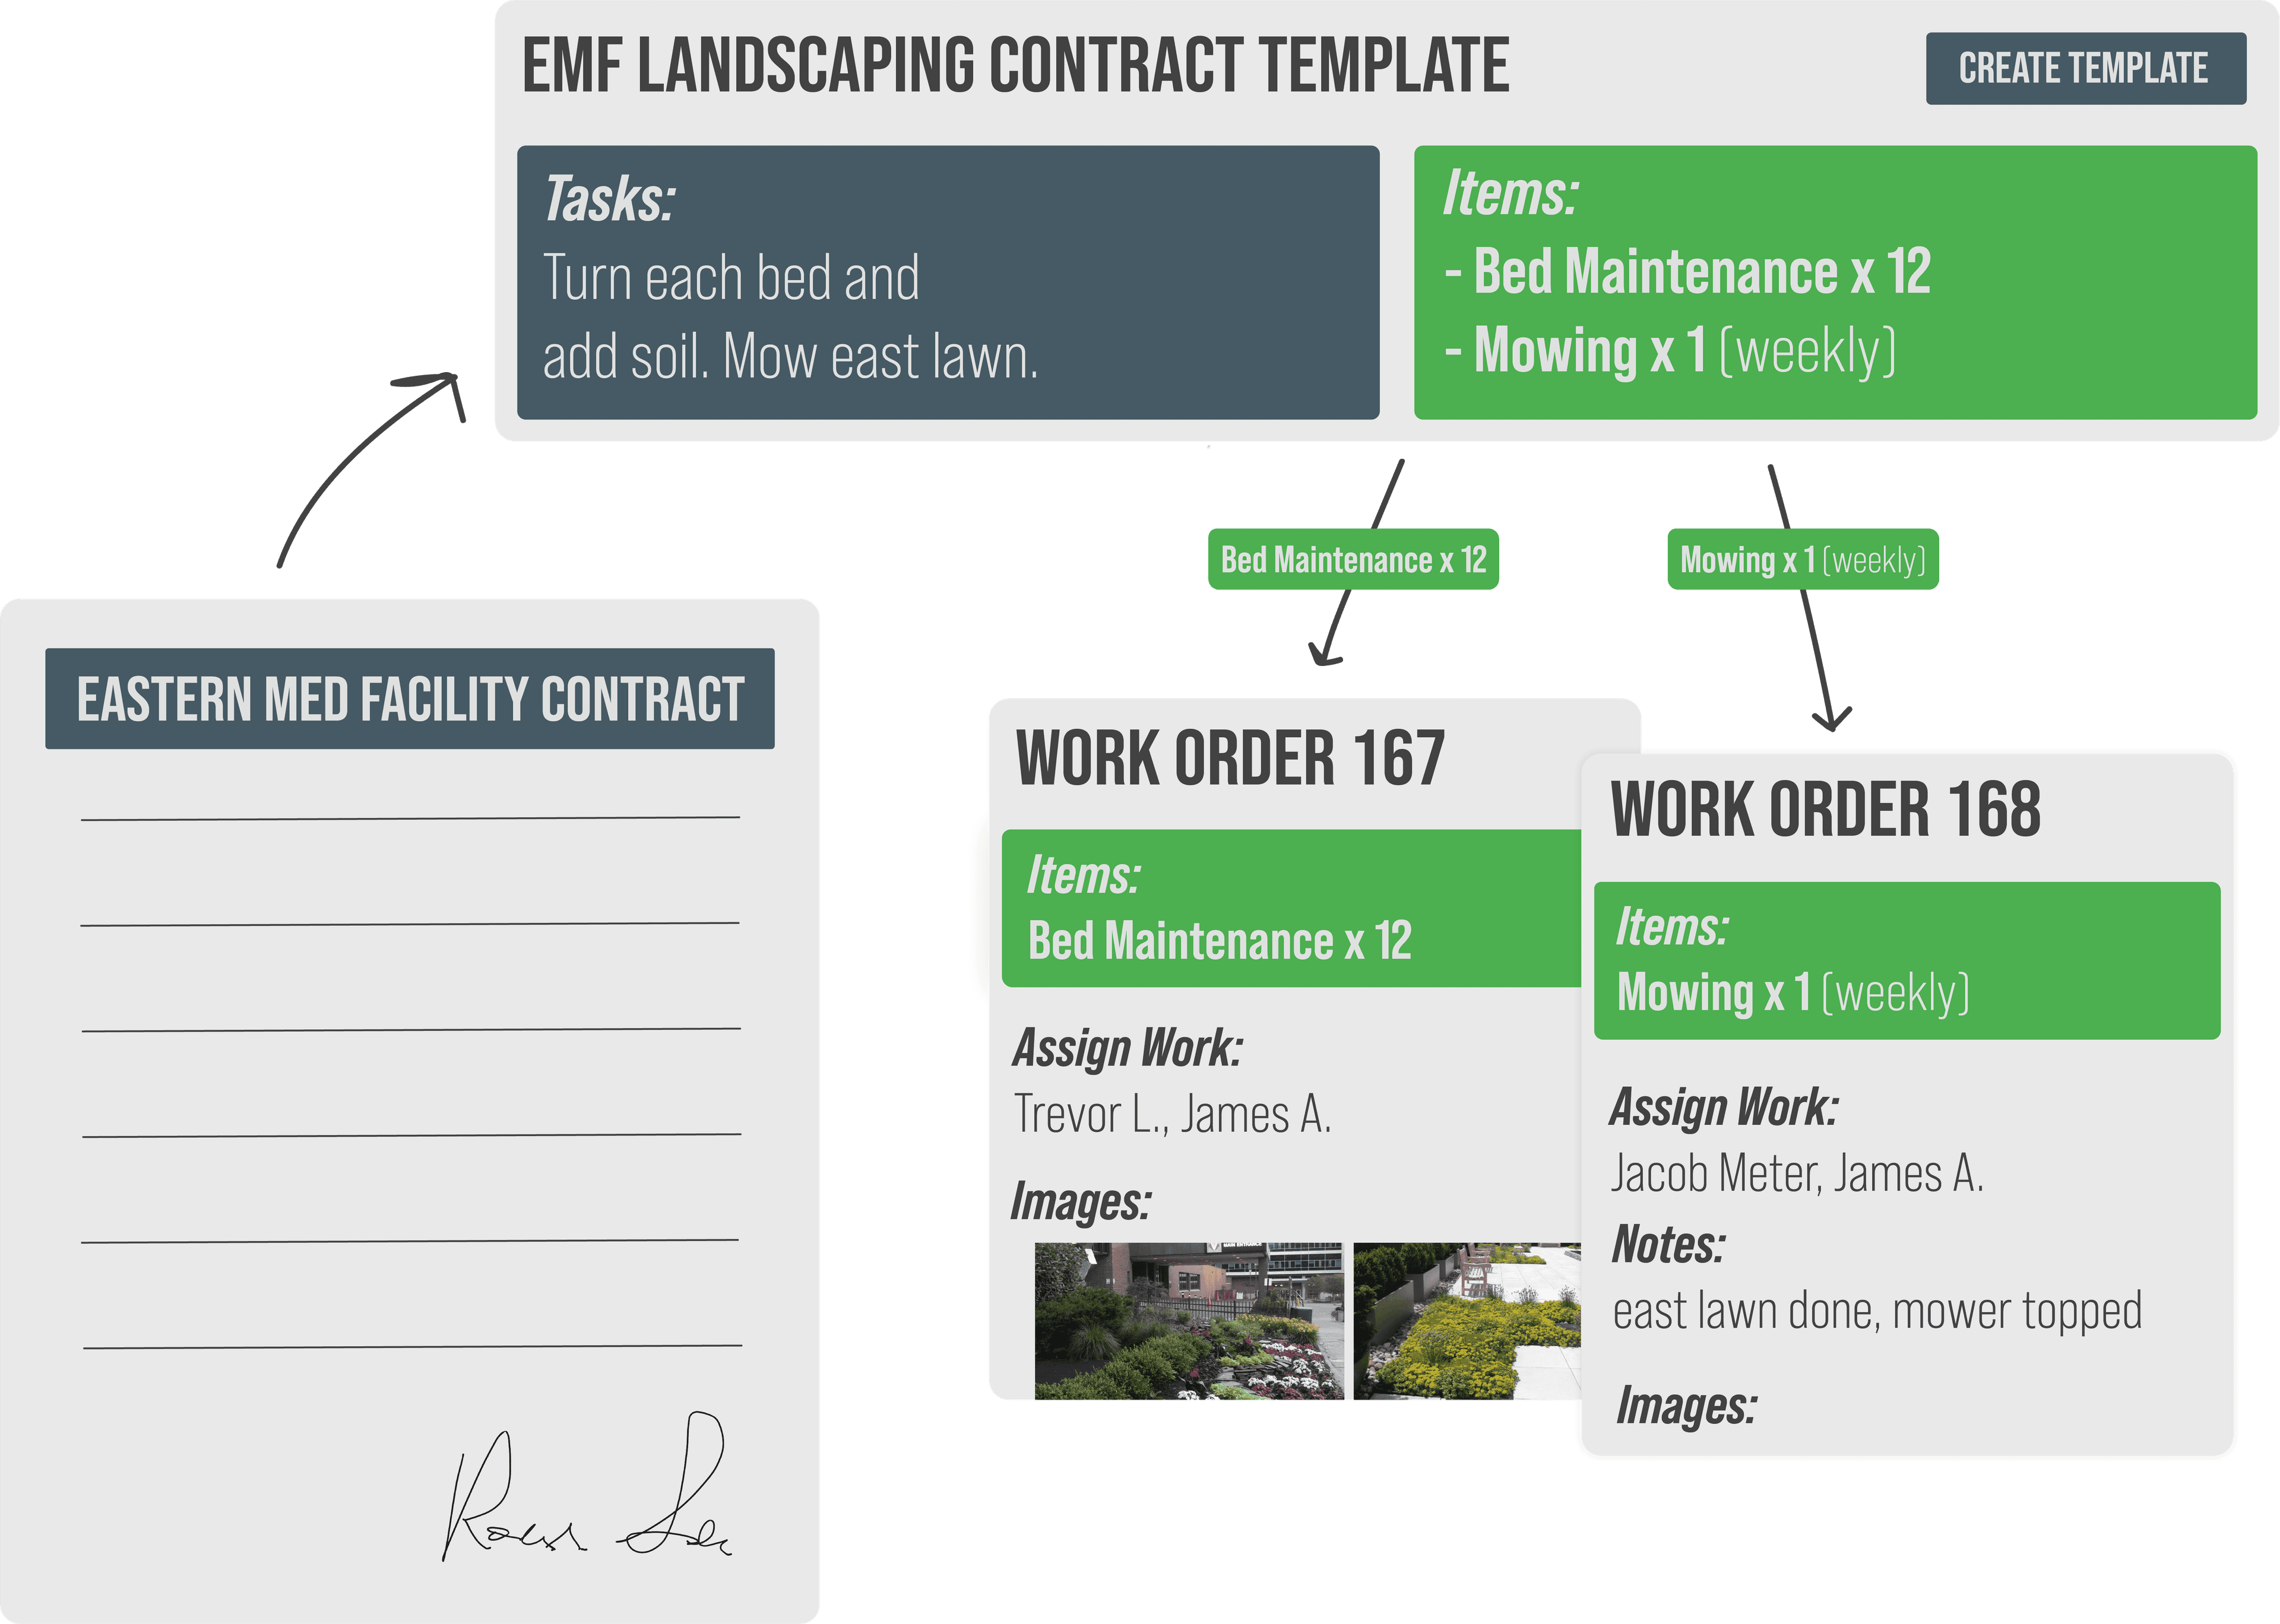
Grouped Contract Services allow different service types under the same Contract to create separate work orders.
This is useful when different crews handle different services, such as:
→ Mowing.
→ Flower bed maintenance.
→ Seasonal cleanups.
Instead of combining all services into one work order:
→ Each service group receives its own work order.
→ Crews can focus on their assigned services.
→ All work remains organized under the same customer Contract.
Create Grouped Contract Services
1. Open the Contract.
2. Select Create Template or Edit Template.
3. Go to the Service tab.
4. Add Services and Parts.
5. Find Service Group.
6. Assign Services to the appropriate group.
→ Each Service Group will generate its own work order.
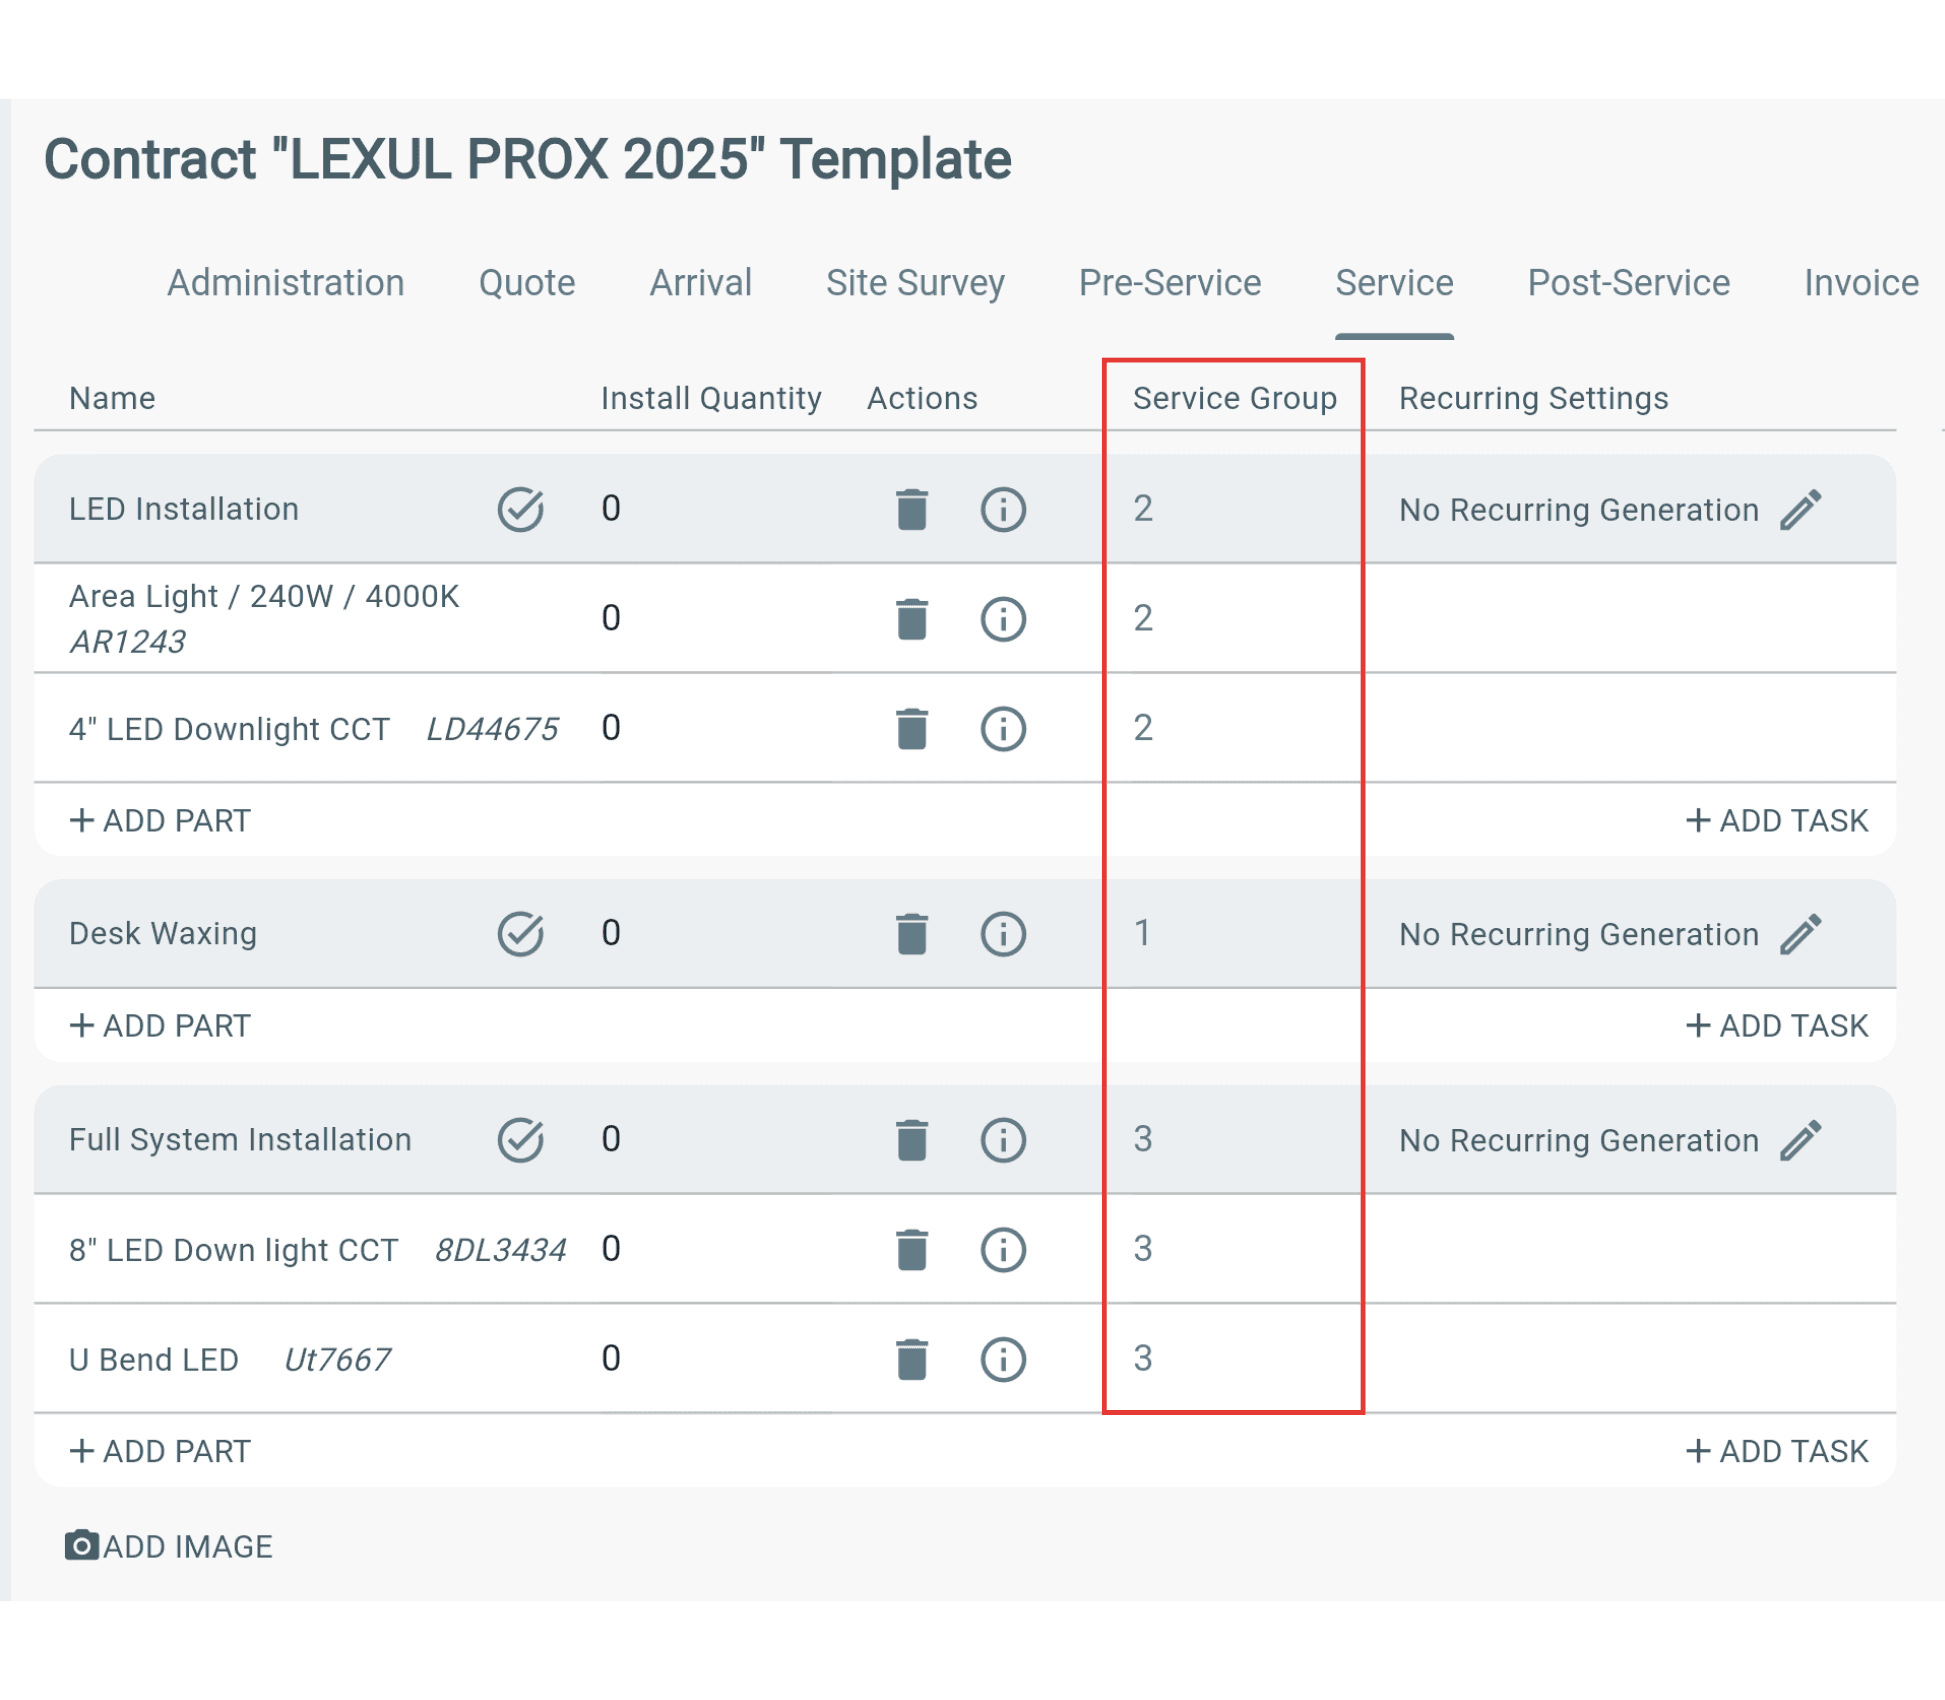
Note: Services with the same Service Grouping number will be placed on the same work order.
Example:
→ Services with Service Grouping = 1 will create one work order together.
→ Services with Service Grouping = 2 will create a separate work order.
If all Services and Parts have the same Service Grouping number:
→ They will all be included on the same generated work order.
Additional Info
Auto Recurring Work Orders are generated:
→ 4:00 AM Eastern Standard Time on the scheduled recurring date.
Generated work orders from Contracts will appear in:
→ Kanban Dashboard
→ Table Dashboard
→ Map Dashboard
To find generated work orders:
→ Use the Advanced Search option on any dashboard.