Equipment, Time, and Material Management
How to add equipment, time, and materials to work orders. How techs can track job equipment time, and how office can approve time on invoice
Technicians can track equipment and time used on a work order.
After time is approved, office staff can import:
- Logged time.
- Materials.
- Equipment.
These items can be added to an invoice with one click.
Add Equipment
Go to:
Equipment → Create Equipment
- Enter the required equipment details.
- Select a Linked Item.
- Save the equipment.
Linked Item
- Connects equipment to a service item.
- The linked service item is added to the invoice when equipment is imported.
Example:
- Equipment: Lift
- Linked Item: Lift Charge
Log Equipment on a Work Order
- Open the Work Order.
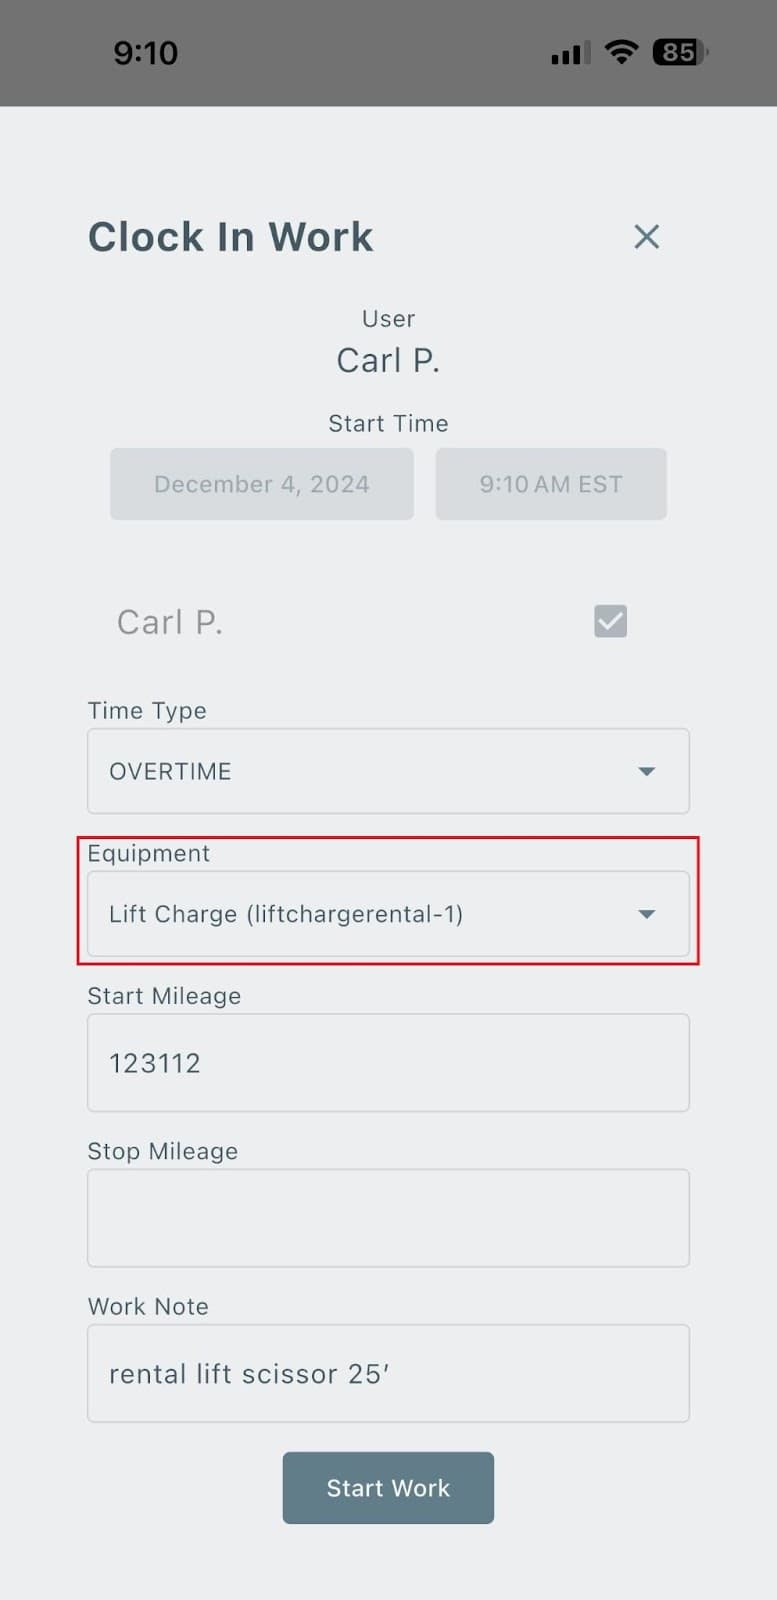
- Select Clock In Work.
- Choose the equipment being used.
- Start tracking time.
Result
- The equipment is attached to the work order.
- After time approval, the equipment appears as an invoice line item when importing time, materials, and equipment.
Linking Default Service Item to a Technician User
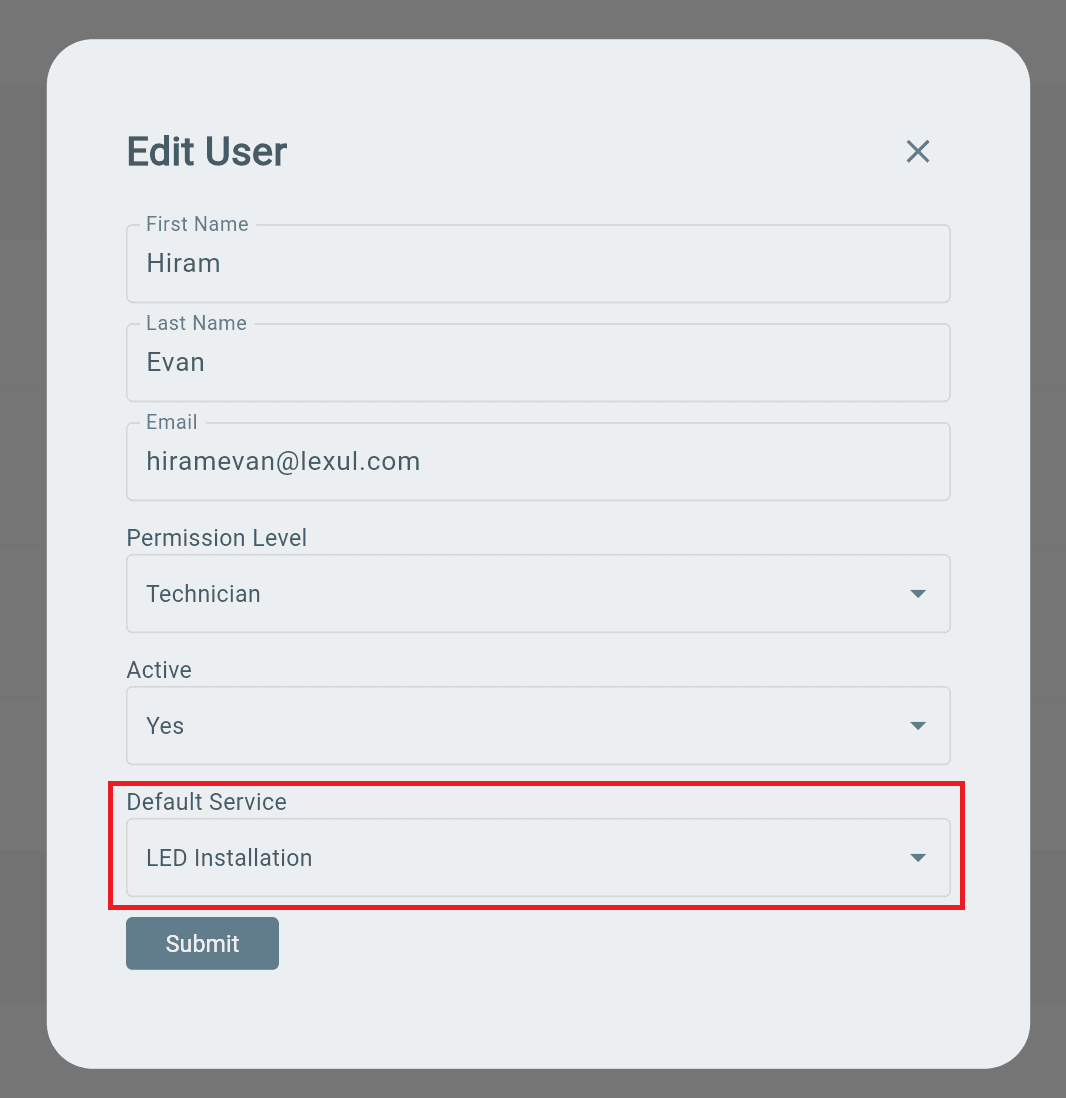
A Default Service links a service item to a technician’s tracked time. When an invoice is created, the tracked time can appear as a line item on the work order, similar to equipment.
Add or Change Default Service
Go to:
Menu → Users
- Search and select the user.
- Select the Edit (pencil) icon in the top-right corner.
- Find Default Service.
- Select or change the service item.
- Save changes.
Note
- The selected service item will be used for the technician’s tracked time when creating invoices.
Importing Equipment, Time, and Materials to Invoice
Time must be approved before it can be added to an invoice.
Approve Time
Go to:
Menu → Timesheets
- Review and approve the technician’s logged time.
Creating Invoice
After all work is completed and items are added:
- Open the Work Order.
- Go to the Invoice tab.
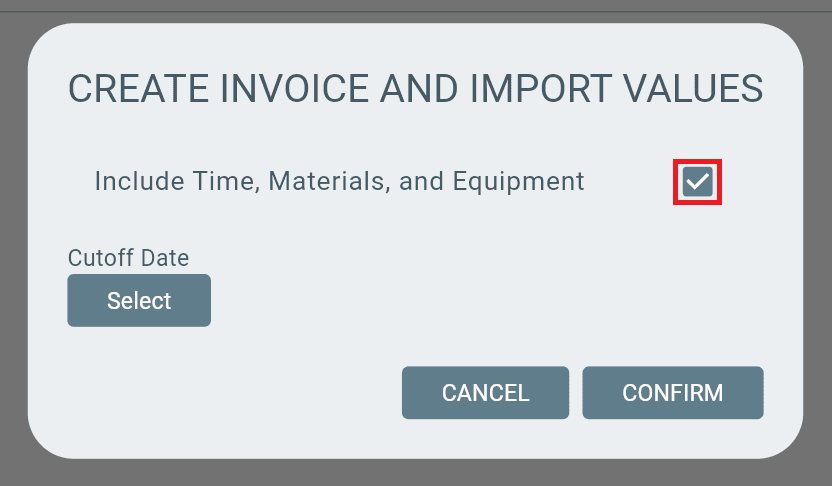
- Select Create Invoice.
- Make sure Include Time, Materials, and Equipment is selected.
- Select Confirm.
Result
- Time, materials, and equipment will appear on the invoice as separate line items.
Adding Markup Price (%) on Invoice Items (including Time, Materials, & Equipment) Using Contracts
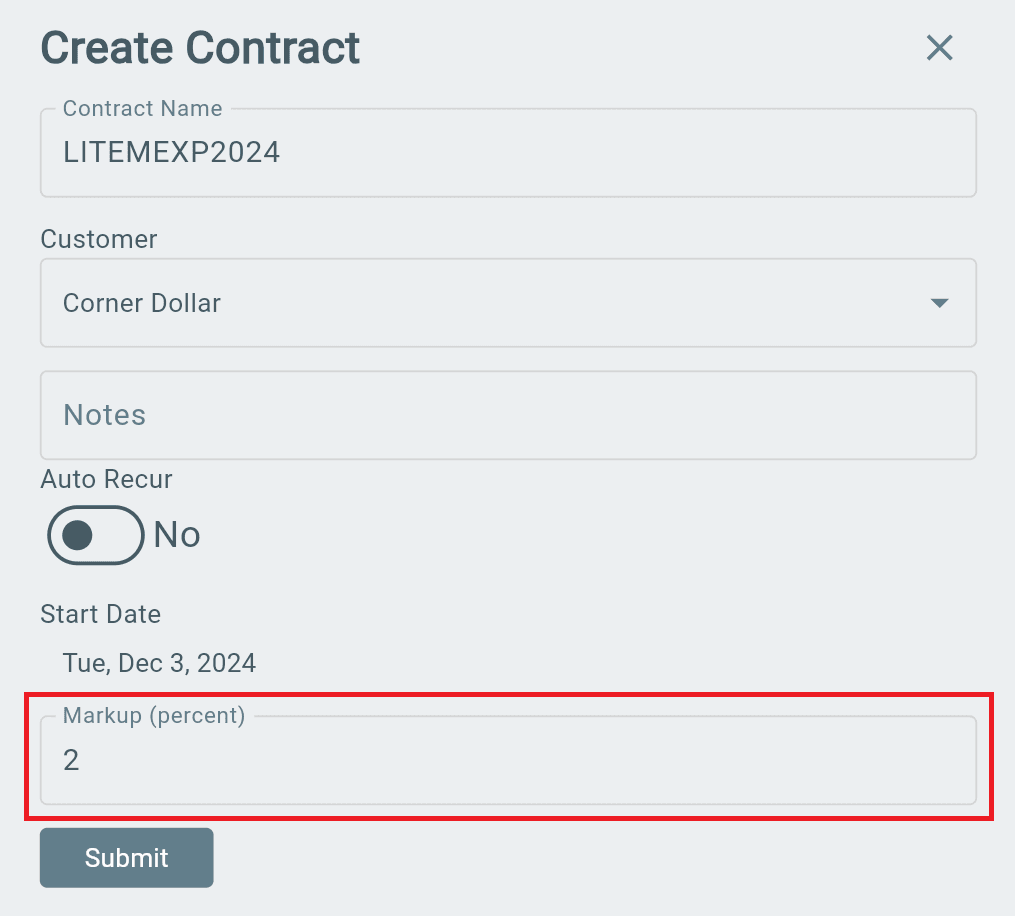
Contract Markup adds a percentage increase to contract pricing.
Create or Edit a Contract
Go to:
Menu → Contracts
To create a new contract:
- Select Create Contract.
- Find the Markup field.
- Enter the markup percentage.
- Save the contract.
To edit an existing contract:
- Open the contract.
- Select the Edit (pencil) icon in the top-right corner.
- Add or update the Markup percentage.
- Save changes.
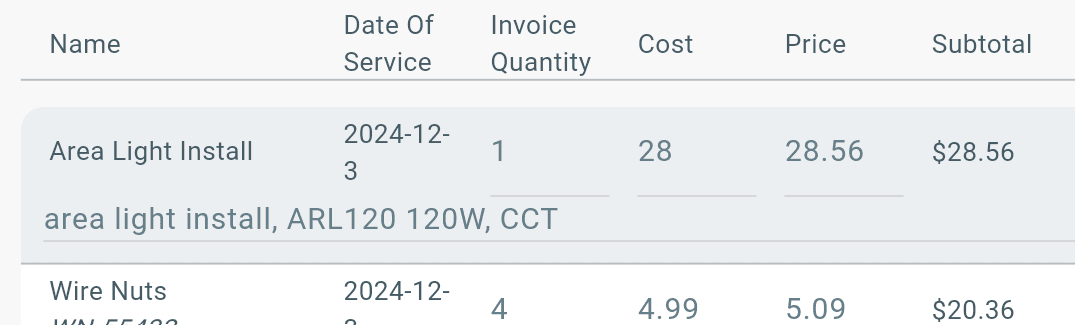
Markup is calculated automatically when creating the invoice.
Example
- Item cost: $28.00
- Contract markup: 2%
- Invoice price: $28.56
The markup is applied to the item cost when the invoice is generated.
Additional Info
Remember that technician work time must be approved (Timesheets page) before it can be imported to the invoice as a line item. One piece of equipment per work time period is currently supported.