Asset Management
Manage, create, view, change, move, view, and more with Customer Assets in Lexul.
Overview
Assets help organize work orders, maintain accurate service records, and improve invoicing.
Use Assets to:
→ Track customer equipment and locations.
→ Organize service history.
→ Manage customers using Active, Inactive, and All Asset lists.
Adding a New Asset
The process for adding an Asset depends on whether you have a QuickBooks integration.
With QuickBooks Integration
QuickBooks Desktop
→ Create a new Job in QuickBooks Desktop.
→ The Job will sync to Lexul Field Service as an Asset.
See How to Add Jobs in QuickBooks Desktop for setup instructions.
QuickBooks Online
→ Create a new Sub-Customer in QuickBooks Online.
→ The Sub-Customer will sync to Lexul Field Service as an Asset.
See How to Add Sub-Customers in QuickBooks Online for setup instructions.
Add Assets from Lexul with QuickBooks
Assets can also be created directly in Lexul and synced back to QuickBooks.
To add an Asset:
→ Add the Asset from:
- Customers
- New Work Order
→ Make sure Sync to QuickBooks is enabled
Without QuickBooks Integration
If you do not have an accounting integration:
1. Go to Customers from the menu.
2. Select the customer.
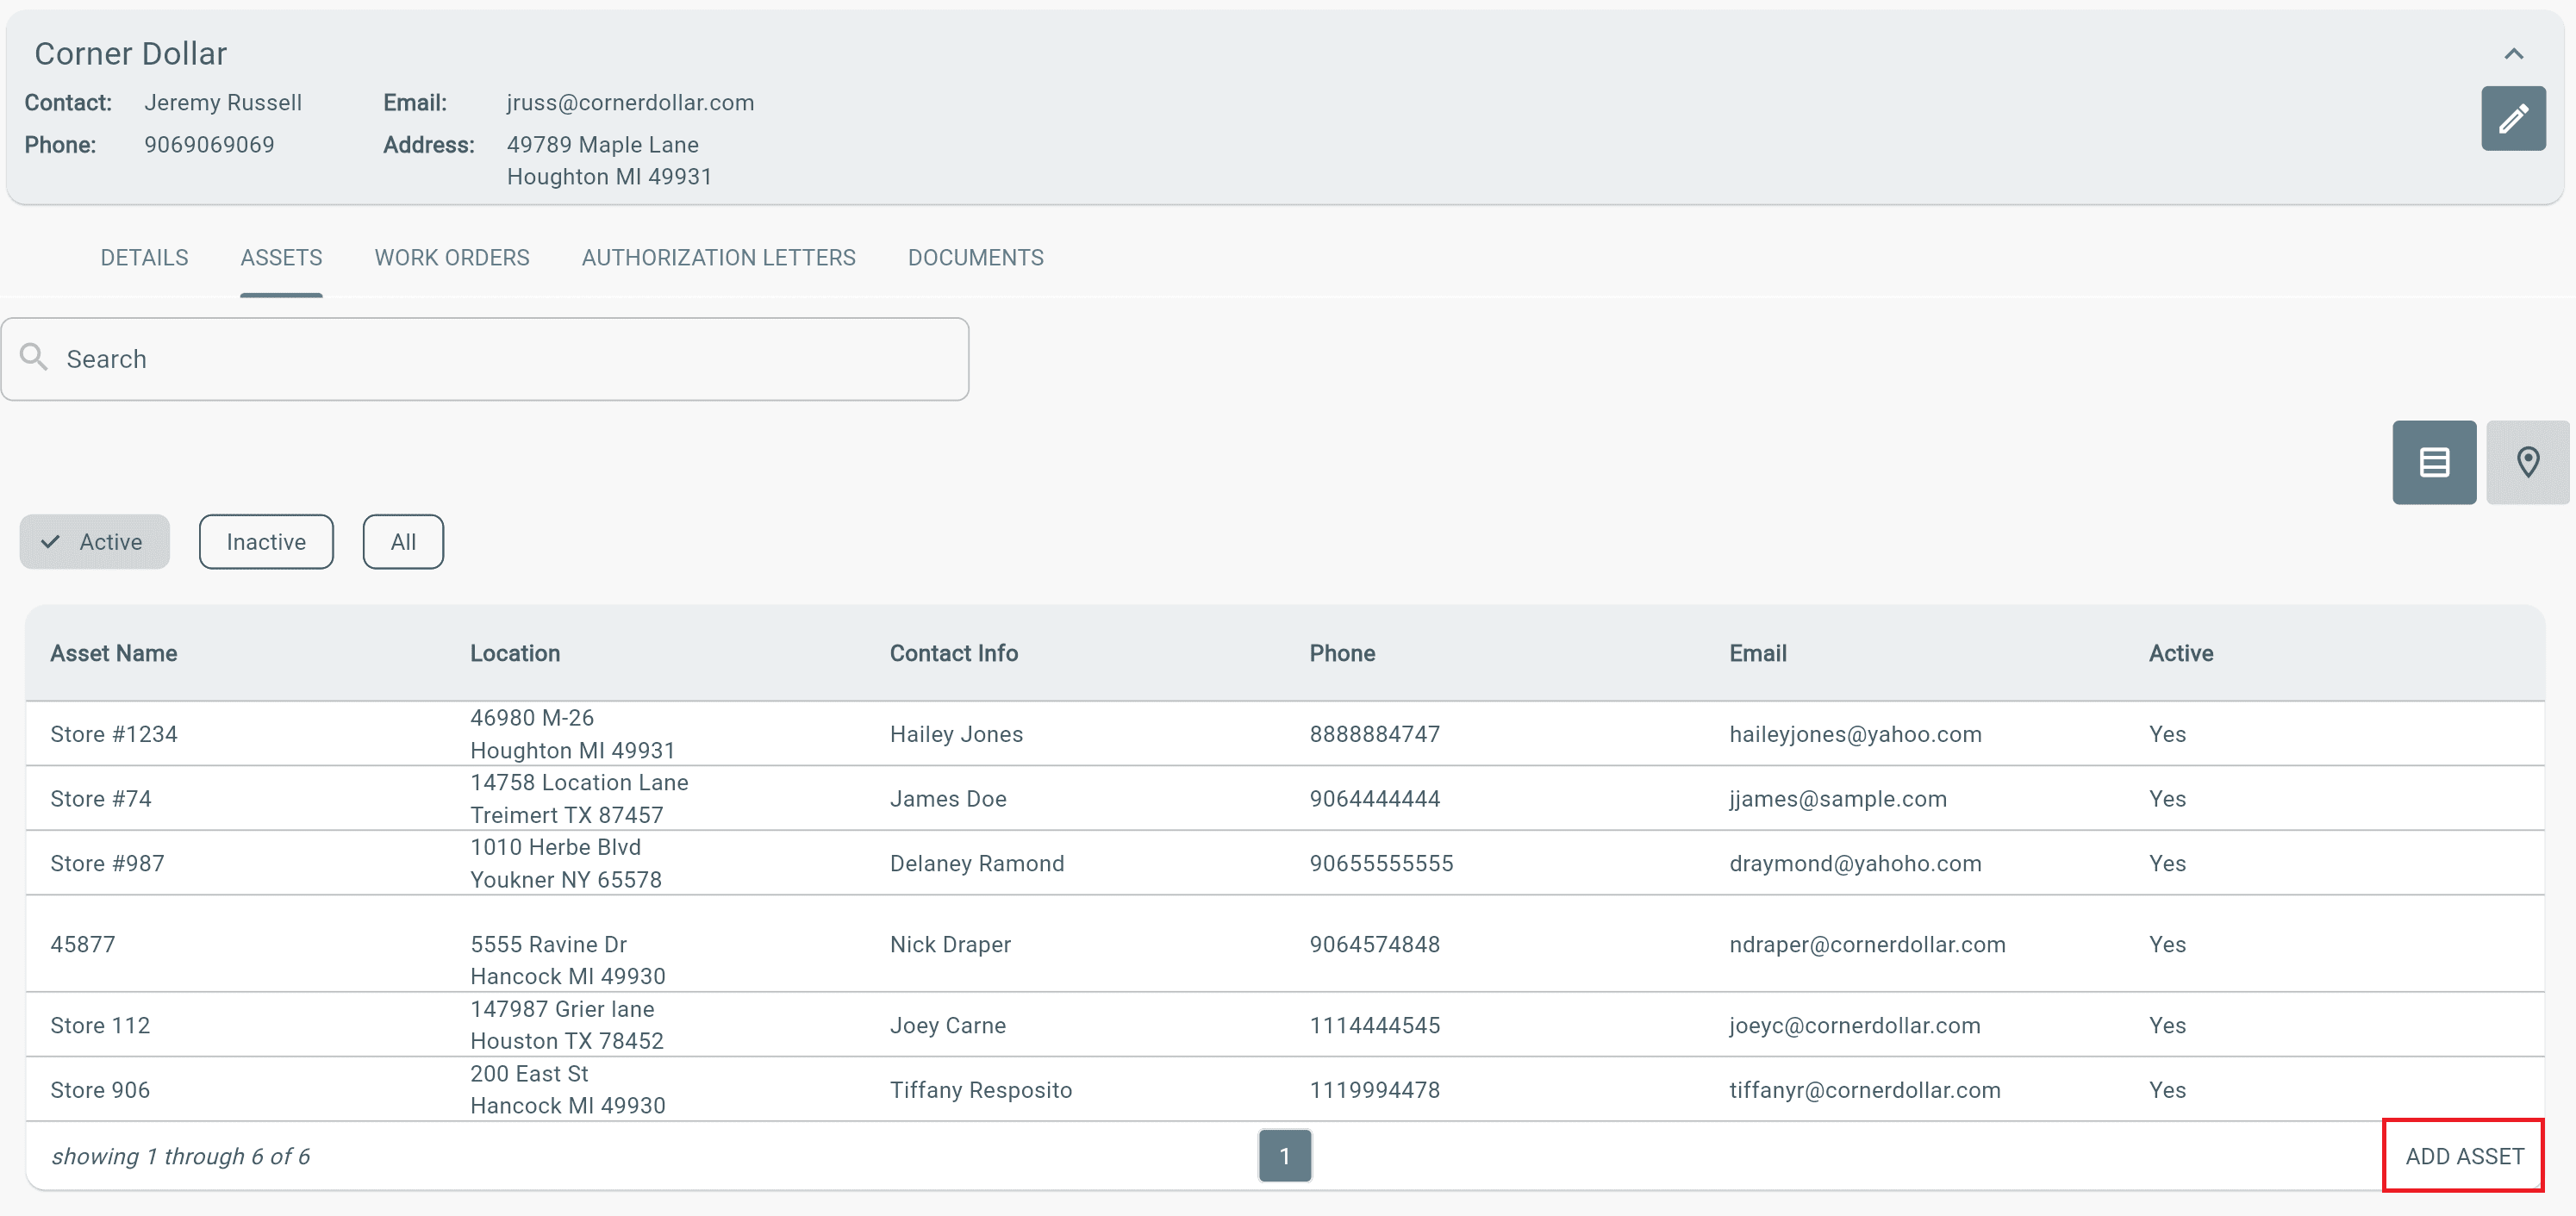
3. Open the Assets tab.
4. Select the blue + Action button in the bottom-right corner.
5. Enter the Asset details.
6. Select Submit.
The new Asset will now be available for future work orders and service tracking.
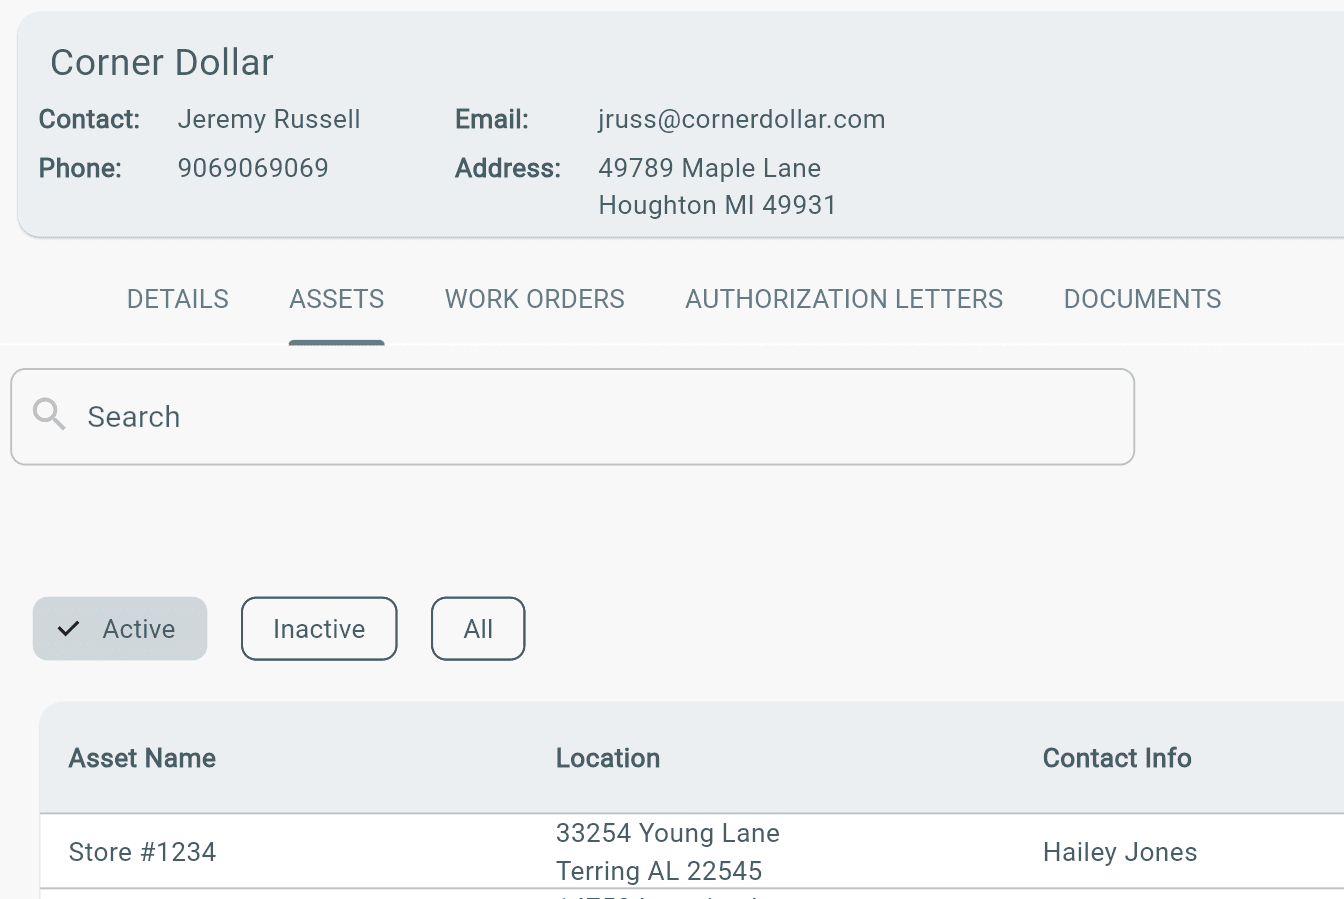
(Adding Asset)
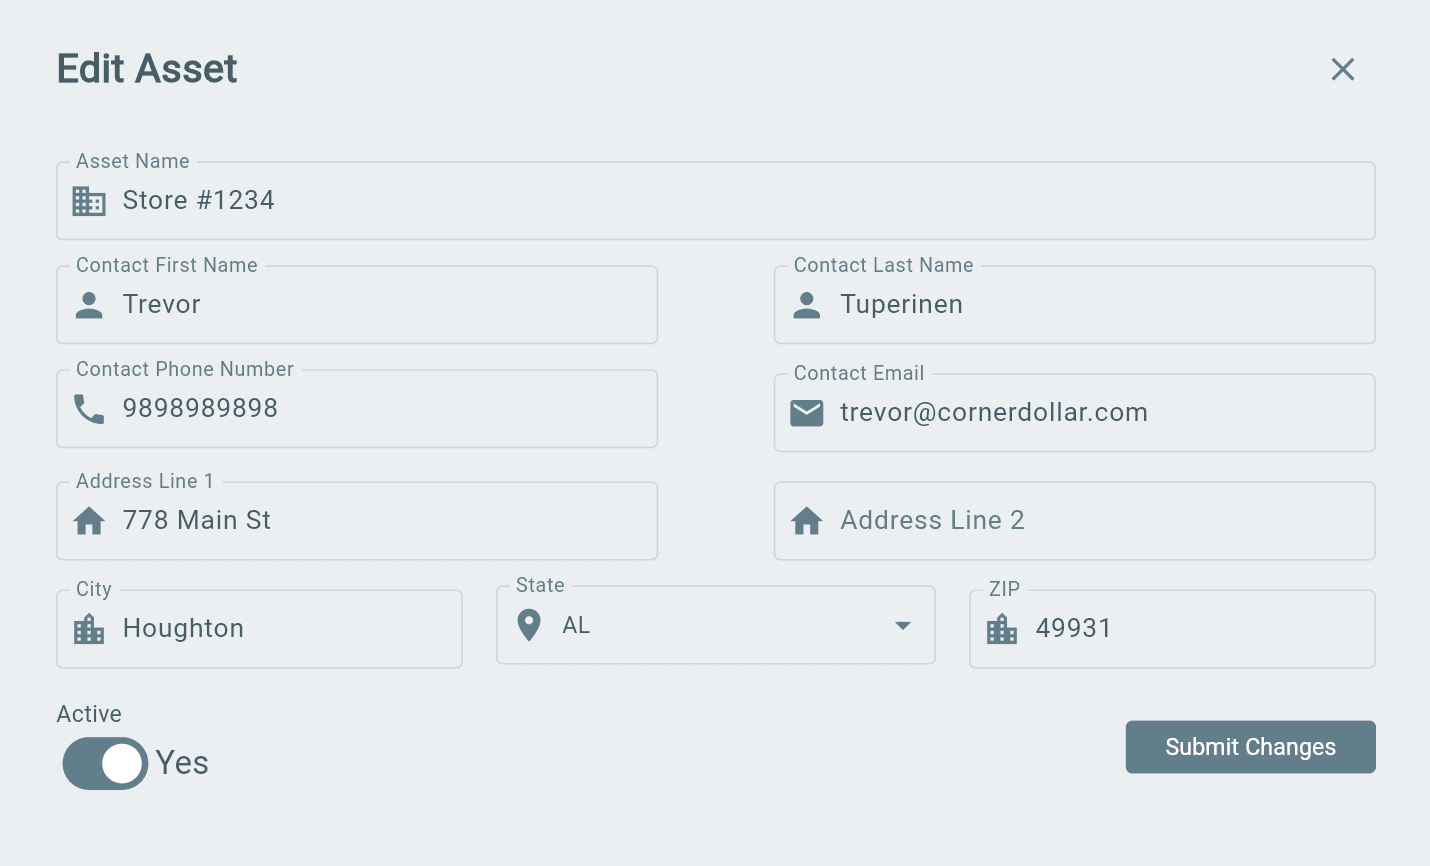
How to Edit an Asset
To update an existing Asset:
1. Find and select the Asset.
2. Select the Edit icon in the top-right corner of the Asset page.
3. Update the needed information.
4. Select Save to apply changes.
Note: If the Asset is connected to QuickBooks Online or QuickBooks Desktop, edits must be made in QuickBooks first and then synced to Lexul Field Service.

Note: Editing an Asset allows you to update the following fields:
→ Asset Name
→ First Name
→ Last Name
→ Email
→ Phone
→ Address 1
→ Address 2
→ City
→ State
→ Zip Code
→ Active/Inactive Status Toggle
These fields can be changed directly from the Asset page unless the Asset is managed through QuickBooks.
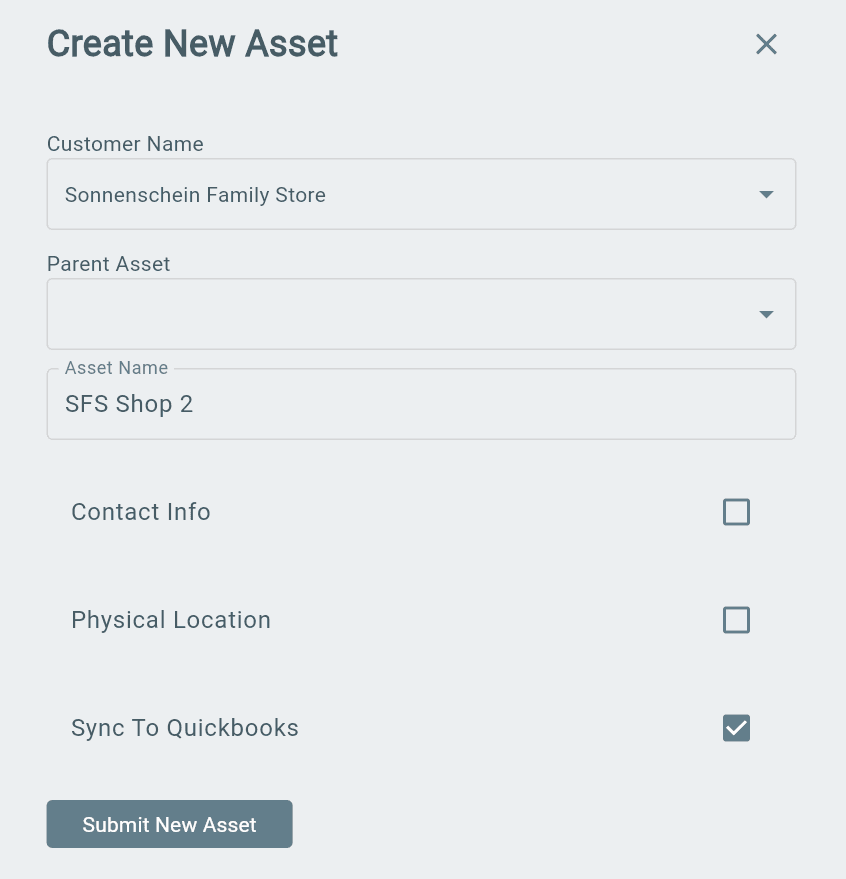
Add a New Asset to QuickBooks Online
When using a QuickBooks Online integration, Assets are created as Sub-Customers in QuickBooks Online.
Create a New Asset (Sub-Customer)
1. Open the Asset dropdown.
2. Select the + Add button next to the Asset dropdown.
3. Choose Add New Sub-Customer.
4. Enter the required details and save.
The new Asset will sync to QuickBooks Online based on the sync setting:
→ Sync to QuickBooks enabled = Asset will sync to QuickBooks Online.
→ Sync to QuickBooks disabled = Asset will remain only in Lexul Field Service.
Note: This feature is only available for workspaces connected to QuickBooks Online.
Lexul Field Service allows office staff to create and manage Assets (Sub-Customers) without needing direct access to QuickBooks Online.
This helps:
→ Keep financial information private.
→ Improve Asset tracking and organization.
→ Choose which Assets sync with QuickBooks Online.
→ Provide more flexibility when managing customer locations and equipment.
Sync QuickBooks Online Projects as Assets
QuickBooks Online Projects can automatically sync to Lexul as Assets.
To create a synced Project:
1. Open QuickBooks Online.
2. Create a new Project.
3. Select the related Customer.
4. Save the Project.
The Project will sync to Lexul as an Asset under that Customer.
View Assets on a Map
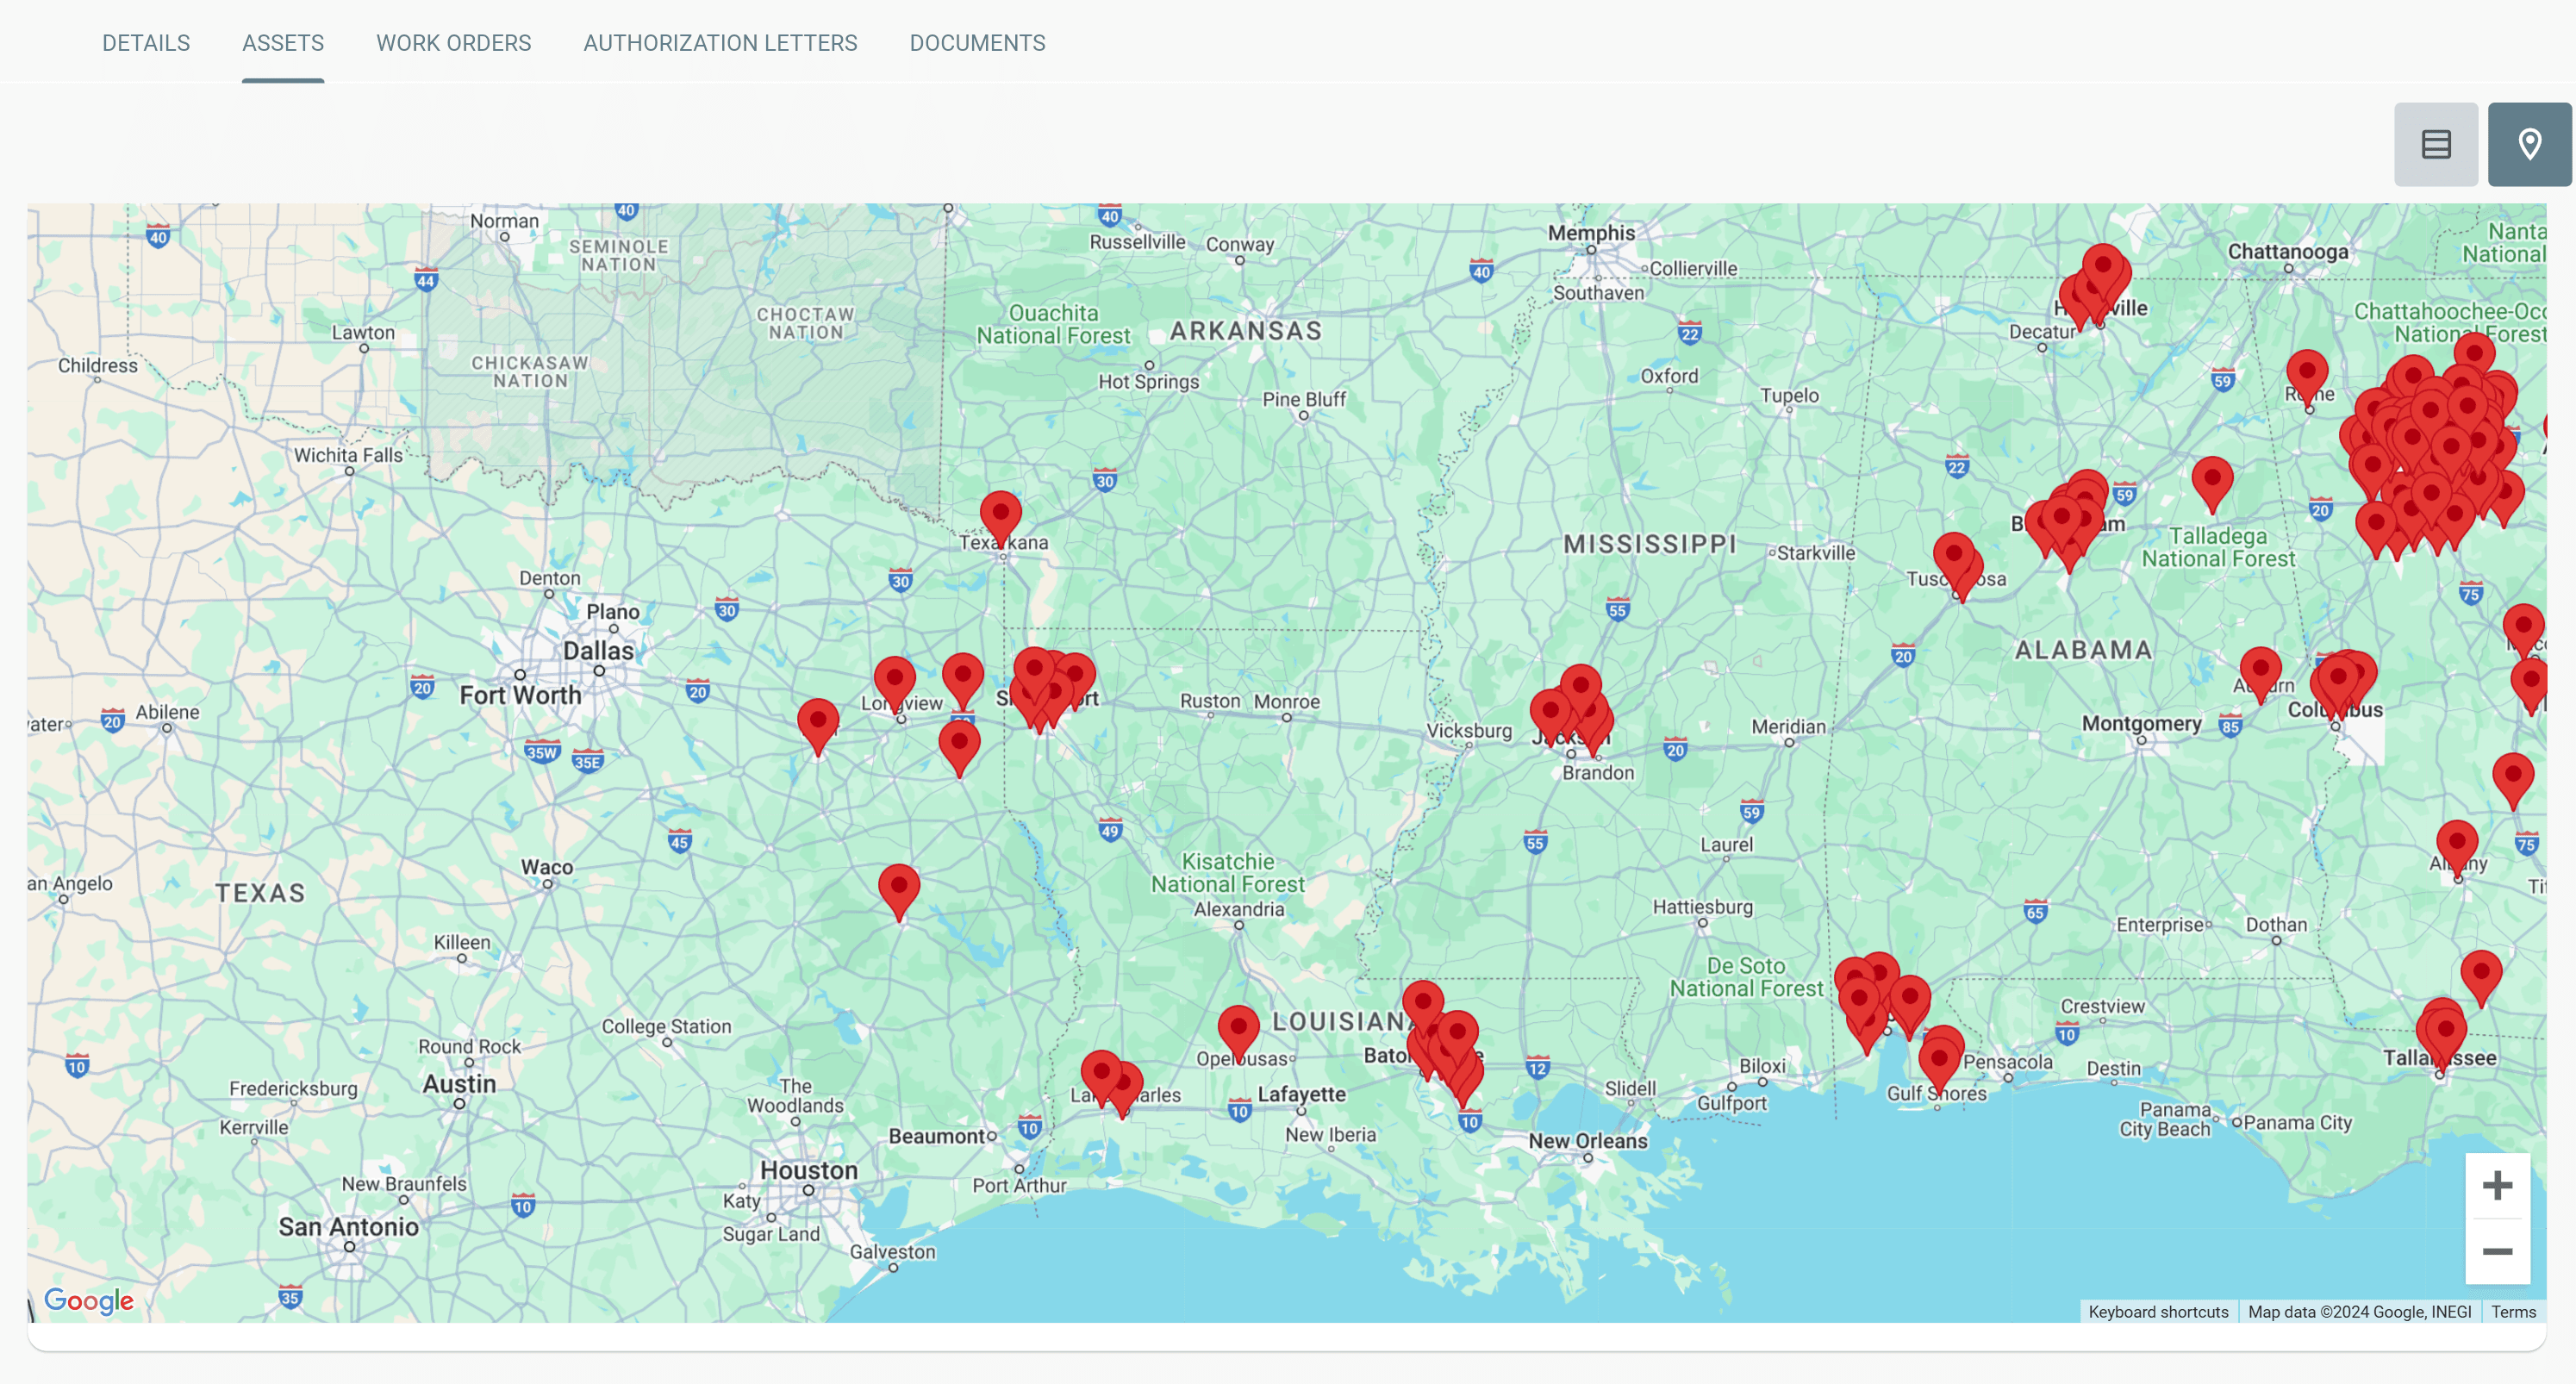
To view customer Assets on a map:
1. Open the Customer.
2. Select the Assets tab.
3. Select the Map View icon in the top-right corner.
4. Select a location pin on the map.
→ You will be taken directly to that Asset’s page.
Where Asset Information is Used
Asset information is shown throughout Lexul Field Service in the following locations:
- Work Order: If a WO is assigned to an Asset, the customer name, address, and contact information will be shown at the top of the WO.
- Dashboard: Shown on the kanban, table, and map dashboard view, connected to its work order.
- Contract: If an Asset is part of a Recurring or Duplication Contract, it will be listed in the Contract Asset table of that contract.
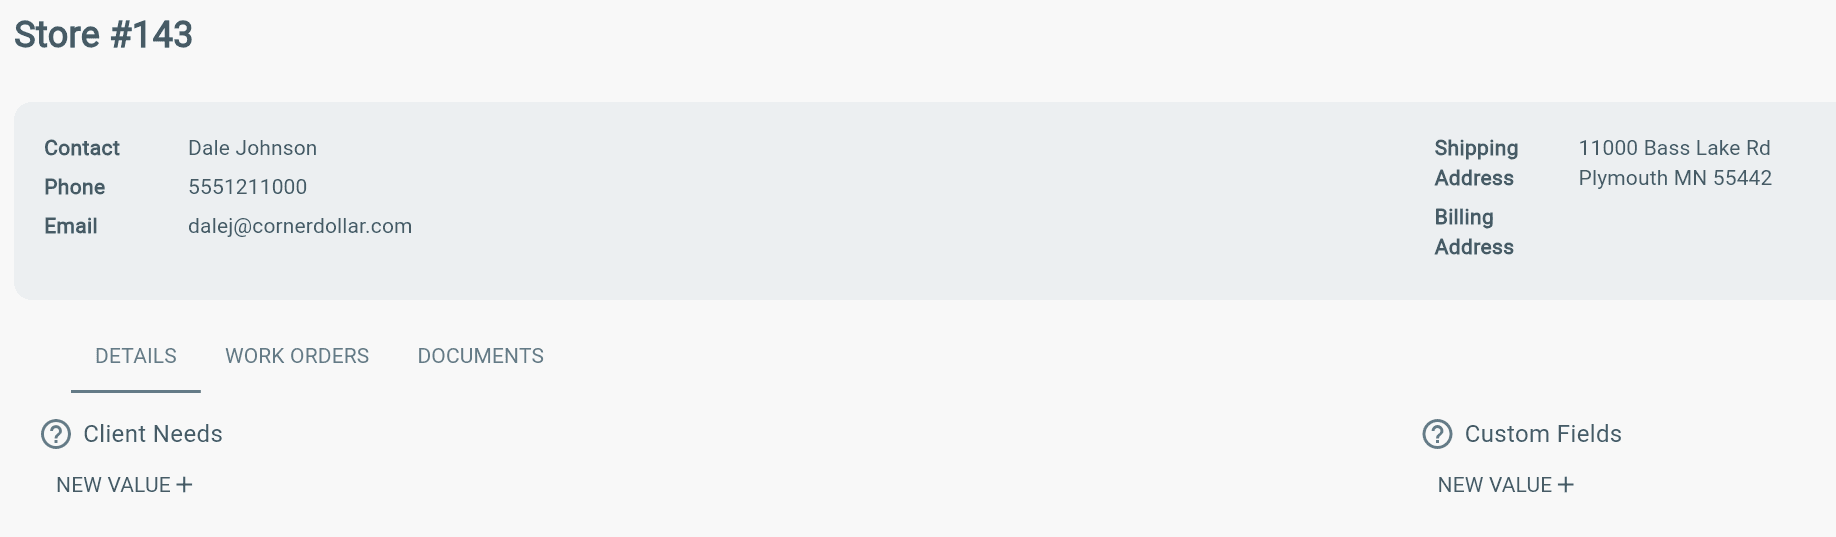
Custom Fields
Custom fields can be added to Assets under DETAILS. This way when this asset is added to a new work order, the custom field will show on the work order.
Creating Sub-Assets (Nested Assets)
Overview
Sub-Assets allow you to organize Assets under a parent Asset for better tracking and management.
Examples:
→ A building with multiple locations.
→ A customer location with multiple pieces of equipment.
→ A main Job with related sub-Jobs.
Sub-Assets can be created through QuickBooks Online, QuickBooks Desktop, or directly in Lexul Field Service.
QuickBooks Online
To create nested Assets from QuickBooks Online:
1. Create a Sub-Customer under an existing Sub-Customer.
2. Sync QuickBooks Online with Lexul.
The Sub-Customer will appear in Lexul as a nested Asset.
QuickBooks Desktop
To create nested Assets from QuickBooks Desktop:
1. Create a Sub-Job under an existing Job.
2. Sync QuickBooks Desktop with Lexul.
The Sub-Job will appear in Lexul as a nested Asset.
Create Sub-Assets in Lexul
To create a Sub-Asset directly in Lexul:
1. Create a new work order from the New Work Order page.
2. Select the parent Asset.
3. Create the new Sub-Asset.
The Sub-Asset can then sync back to QuickBooks during the next sync.
Asset & Work Order Organization
Each Customer has their own Assets, such as:
→ Locations
→ Equipment
→ Service areas
Work orders can be connected to Assets for better tracking.
To view work orders:
→ Open a Customer → Go to the Work Orders tab.
Or
→ Open an Asset → View work orders assigned to that Asset.
Lexul uses the following Asset information:
→ Asset Name
→ Address (Shipping & Billing)
→ Contact Information
→ Phone
→ Email
→ Active Status
Additional Information
QuickBooks Online Sync
→ New Sub-Customers sync automatically to Lexul every few minutes.
QuickBooks Desktop Sync
→ New Jobs sync when you select Update or based on your Web Connector settings.