Customer Management
How to manage, create, edit, use, and view customers in Lexul.
Overview
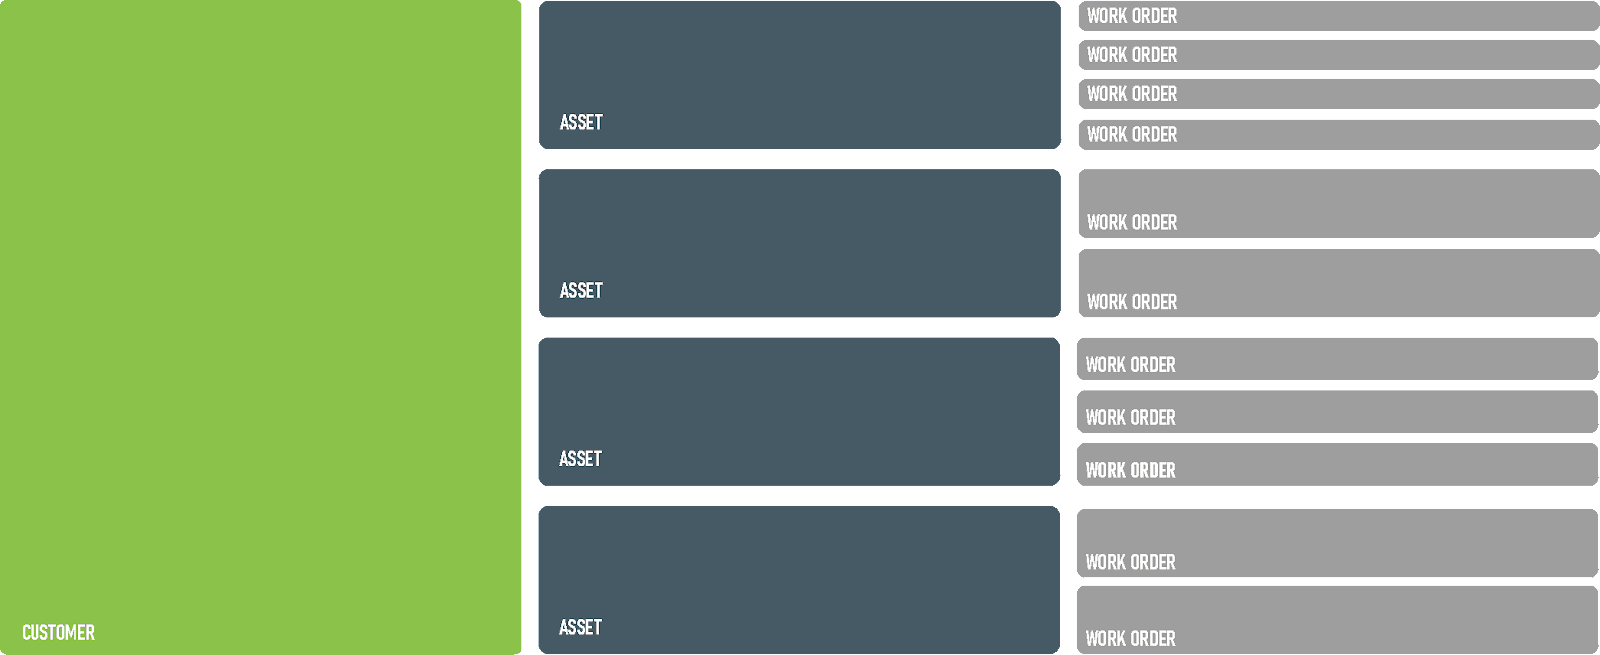
Customers organize work orders, service records, and invoicing in Lexul Field Service.
Use Customers to:
- Keep accurate service records.
- Manage customer information.
- Organize customers by status.
Customer lists include:
- Active Customers.
- Inactive Customers.
- All Customers.
Add a New Customer
If you do not have an accounting integration:
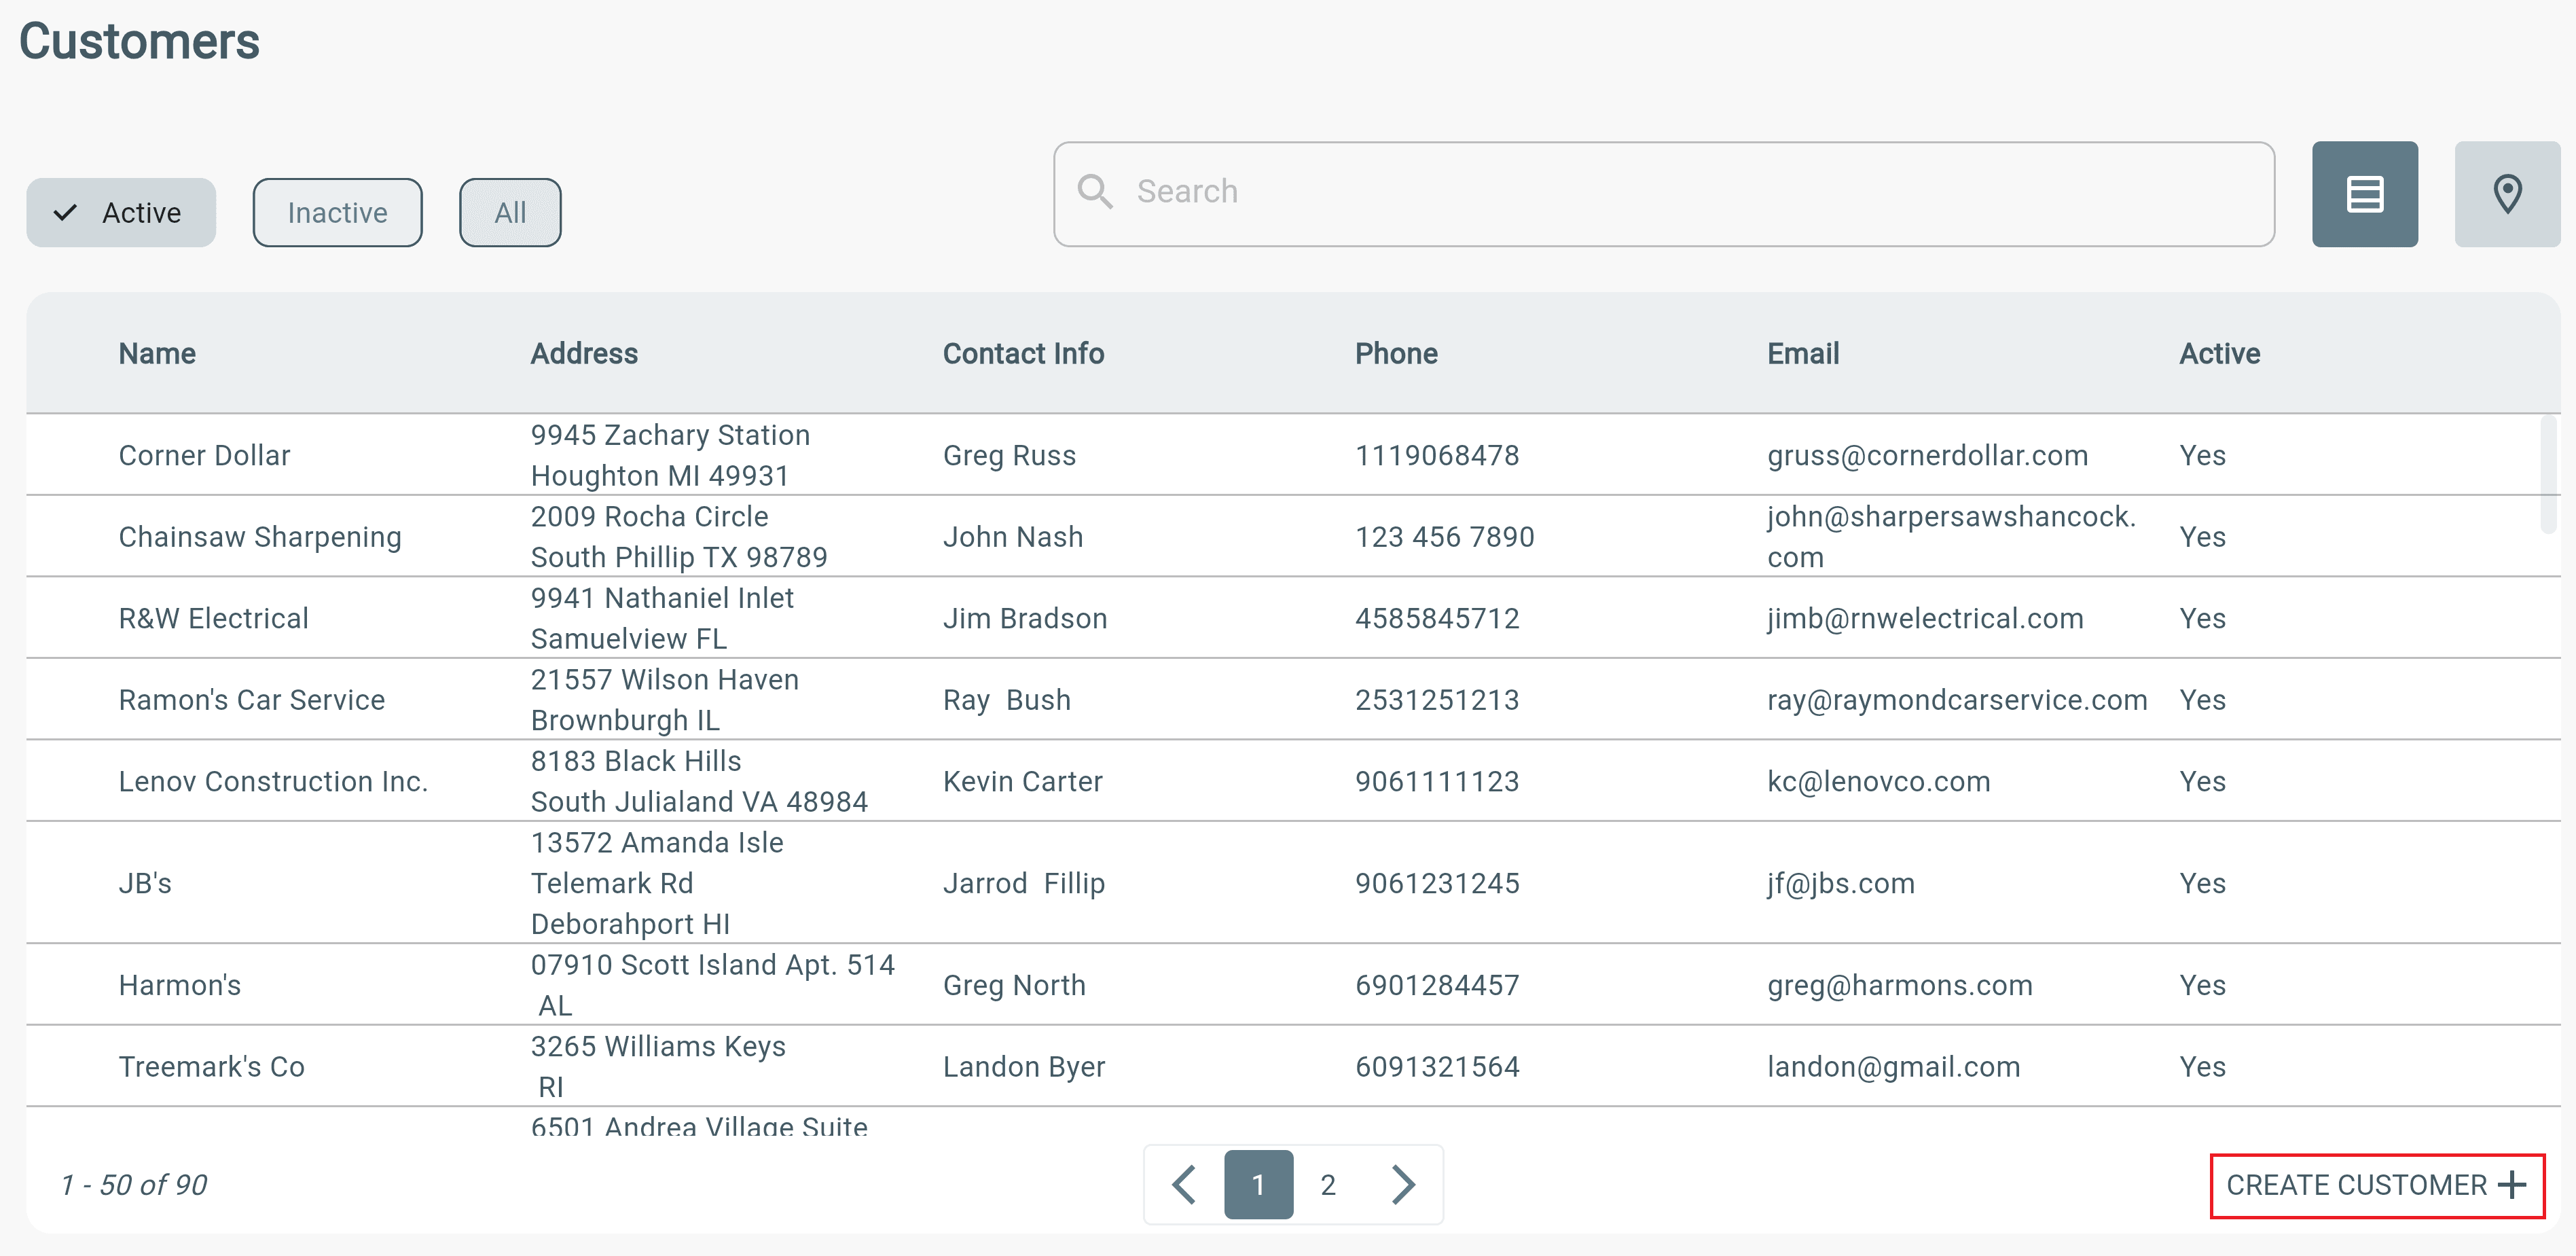
- Go to Menu → Customers.
- Select the Add (+) button in the bottom-right corner.
- Enter the customer details.
- Select Submit to save.
Adding Customers with QuickBooks Integration
When using a QuickBooks integration, customers are managed through QuickBooks and synced with Lexul Field Service.
The steps depend on your QuickBooks connection.
QuickBooks Desktop Integration
To add a customer:
- Create the customer in QuickBooks Desktop.
- Sync QuickBooks with Lexul Field Service.
The customer will appear in Lexul after syncing.
QuickBooks Online Integration
To add a customer:
- Create the customer in QuickBooks Online.
- Sync QuickBooks with Lexul Field Service.
The customer will appear in Lexul after syncing.
You can also create a customer directly in Lexul:
- Go to the New Work Order page.
- Add a new customer.
- Make sure Sync to QuickBooks is enabled.
Add Customers from the New Work Order Page
Customers and sub-customers can be added without opening QuickBooks.
Add a Customer
- Go to Menu → New Work Order.
- Select the + button next to the Customer dropdown.
- Add the customer details.
- Save.
The customer will automatically sync to QuickBooks Online.
Add a Sub-Customer (Asset)
- Select the + button next to the Asset dropdown.
- Add the new sub-customer information.
- Save.
Note
- Sub-customers in Lexul sync as Sub-Customers in QuickBooks Online.
- Syncing to QuickBooks can be controlled using the Sync to QuickBooks toggle.
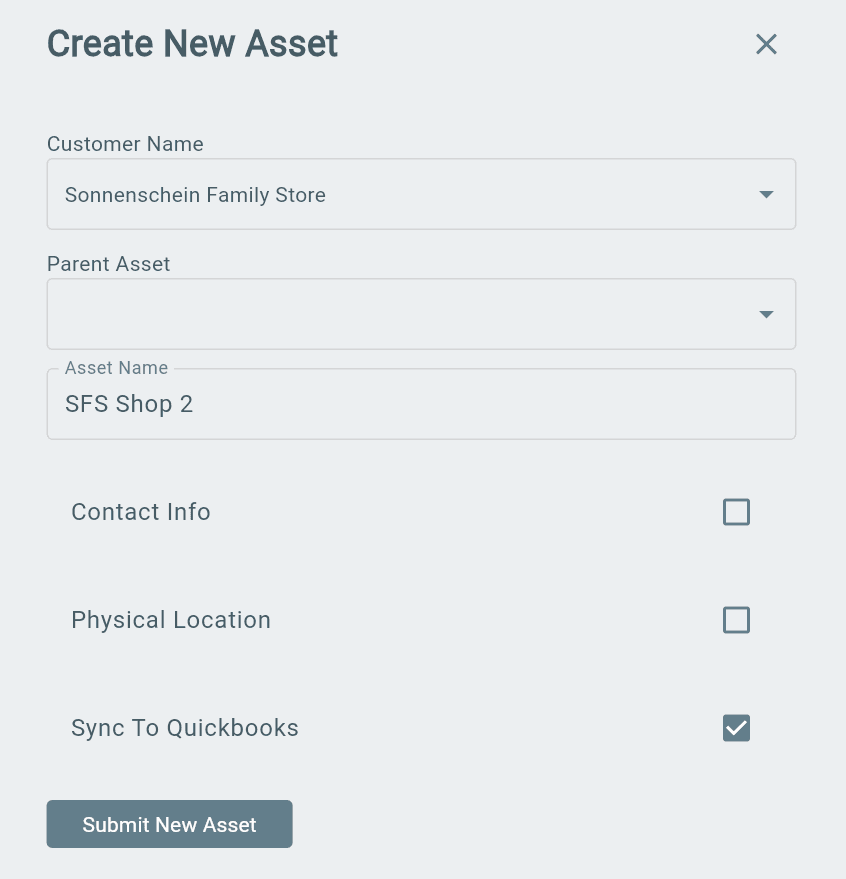
Lexul allows office staff to create and manage customers and sub-customers without direct access to QuickBooks Online.
Including:
- Keeping QuickBooks financial information private.
- Improving asset tracking and management.
- Choosing which assets sync to QuickBooks.
- Adding flexibility when managing customer data.
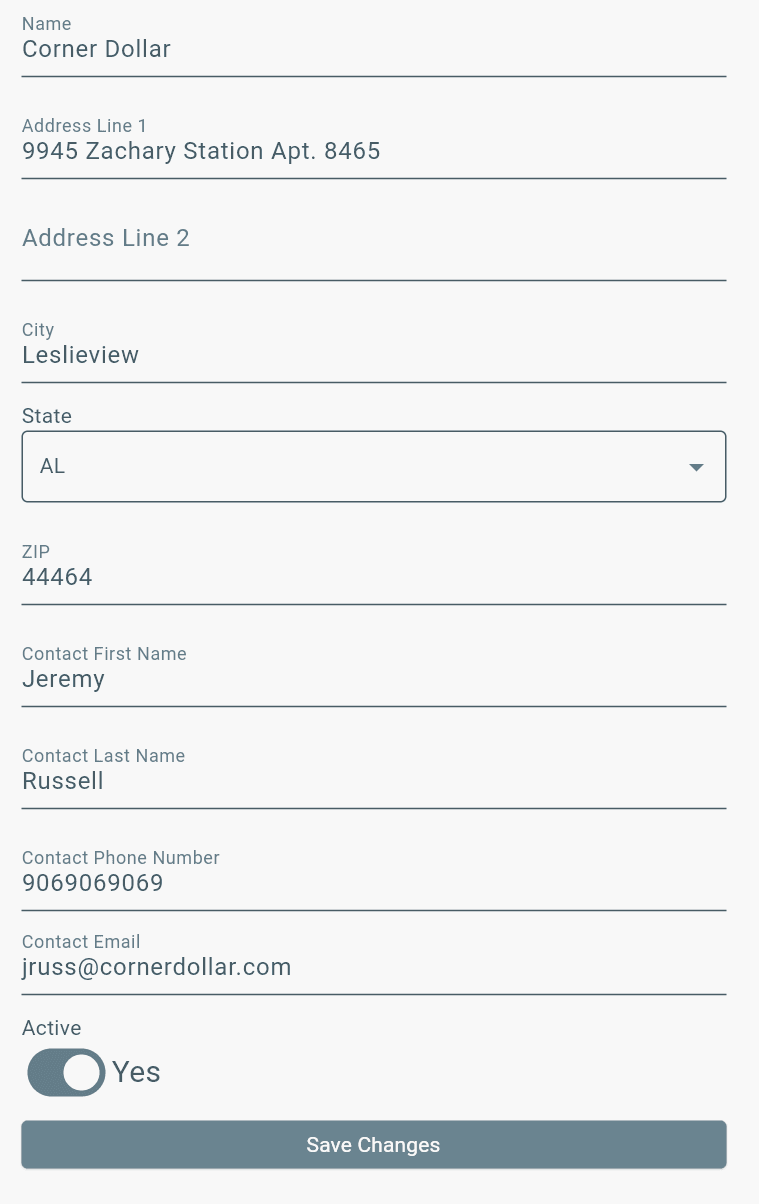
Edit a Customer
To edit a customer in Lexul:
- Go to Customers.
- Select the customer you want to edit.
- Select the Edit (pencil) icon in the top-right corner.
- Update the customer information.
- Save changes.
Note
- Customers created through QuickBooks Online or QuickBooks Desktop must be edited in QuickBooks and then synced to Lexul.

NOTE: Editing a Customer allows you to change to the following fields: Name, Address 1, Address 2, City, State, Zip, First Name, Last Name, Phone Number, Email, and Active status.
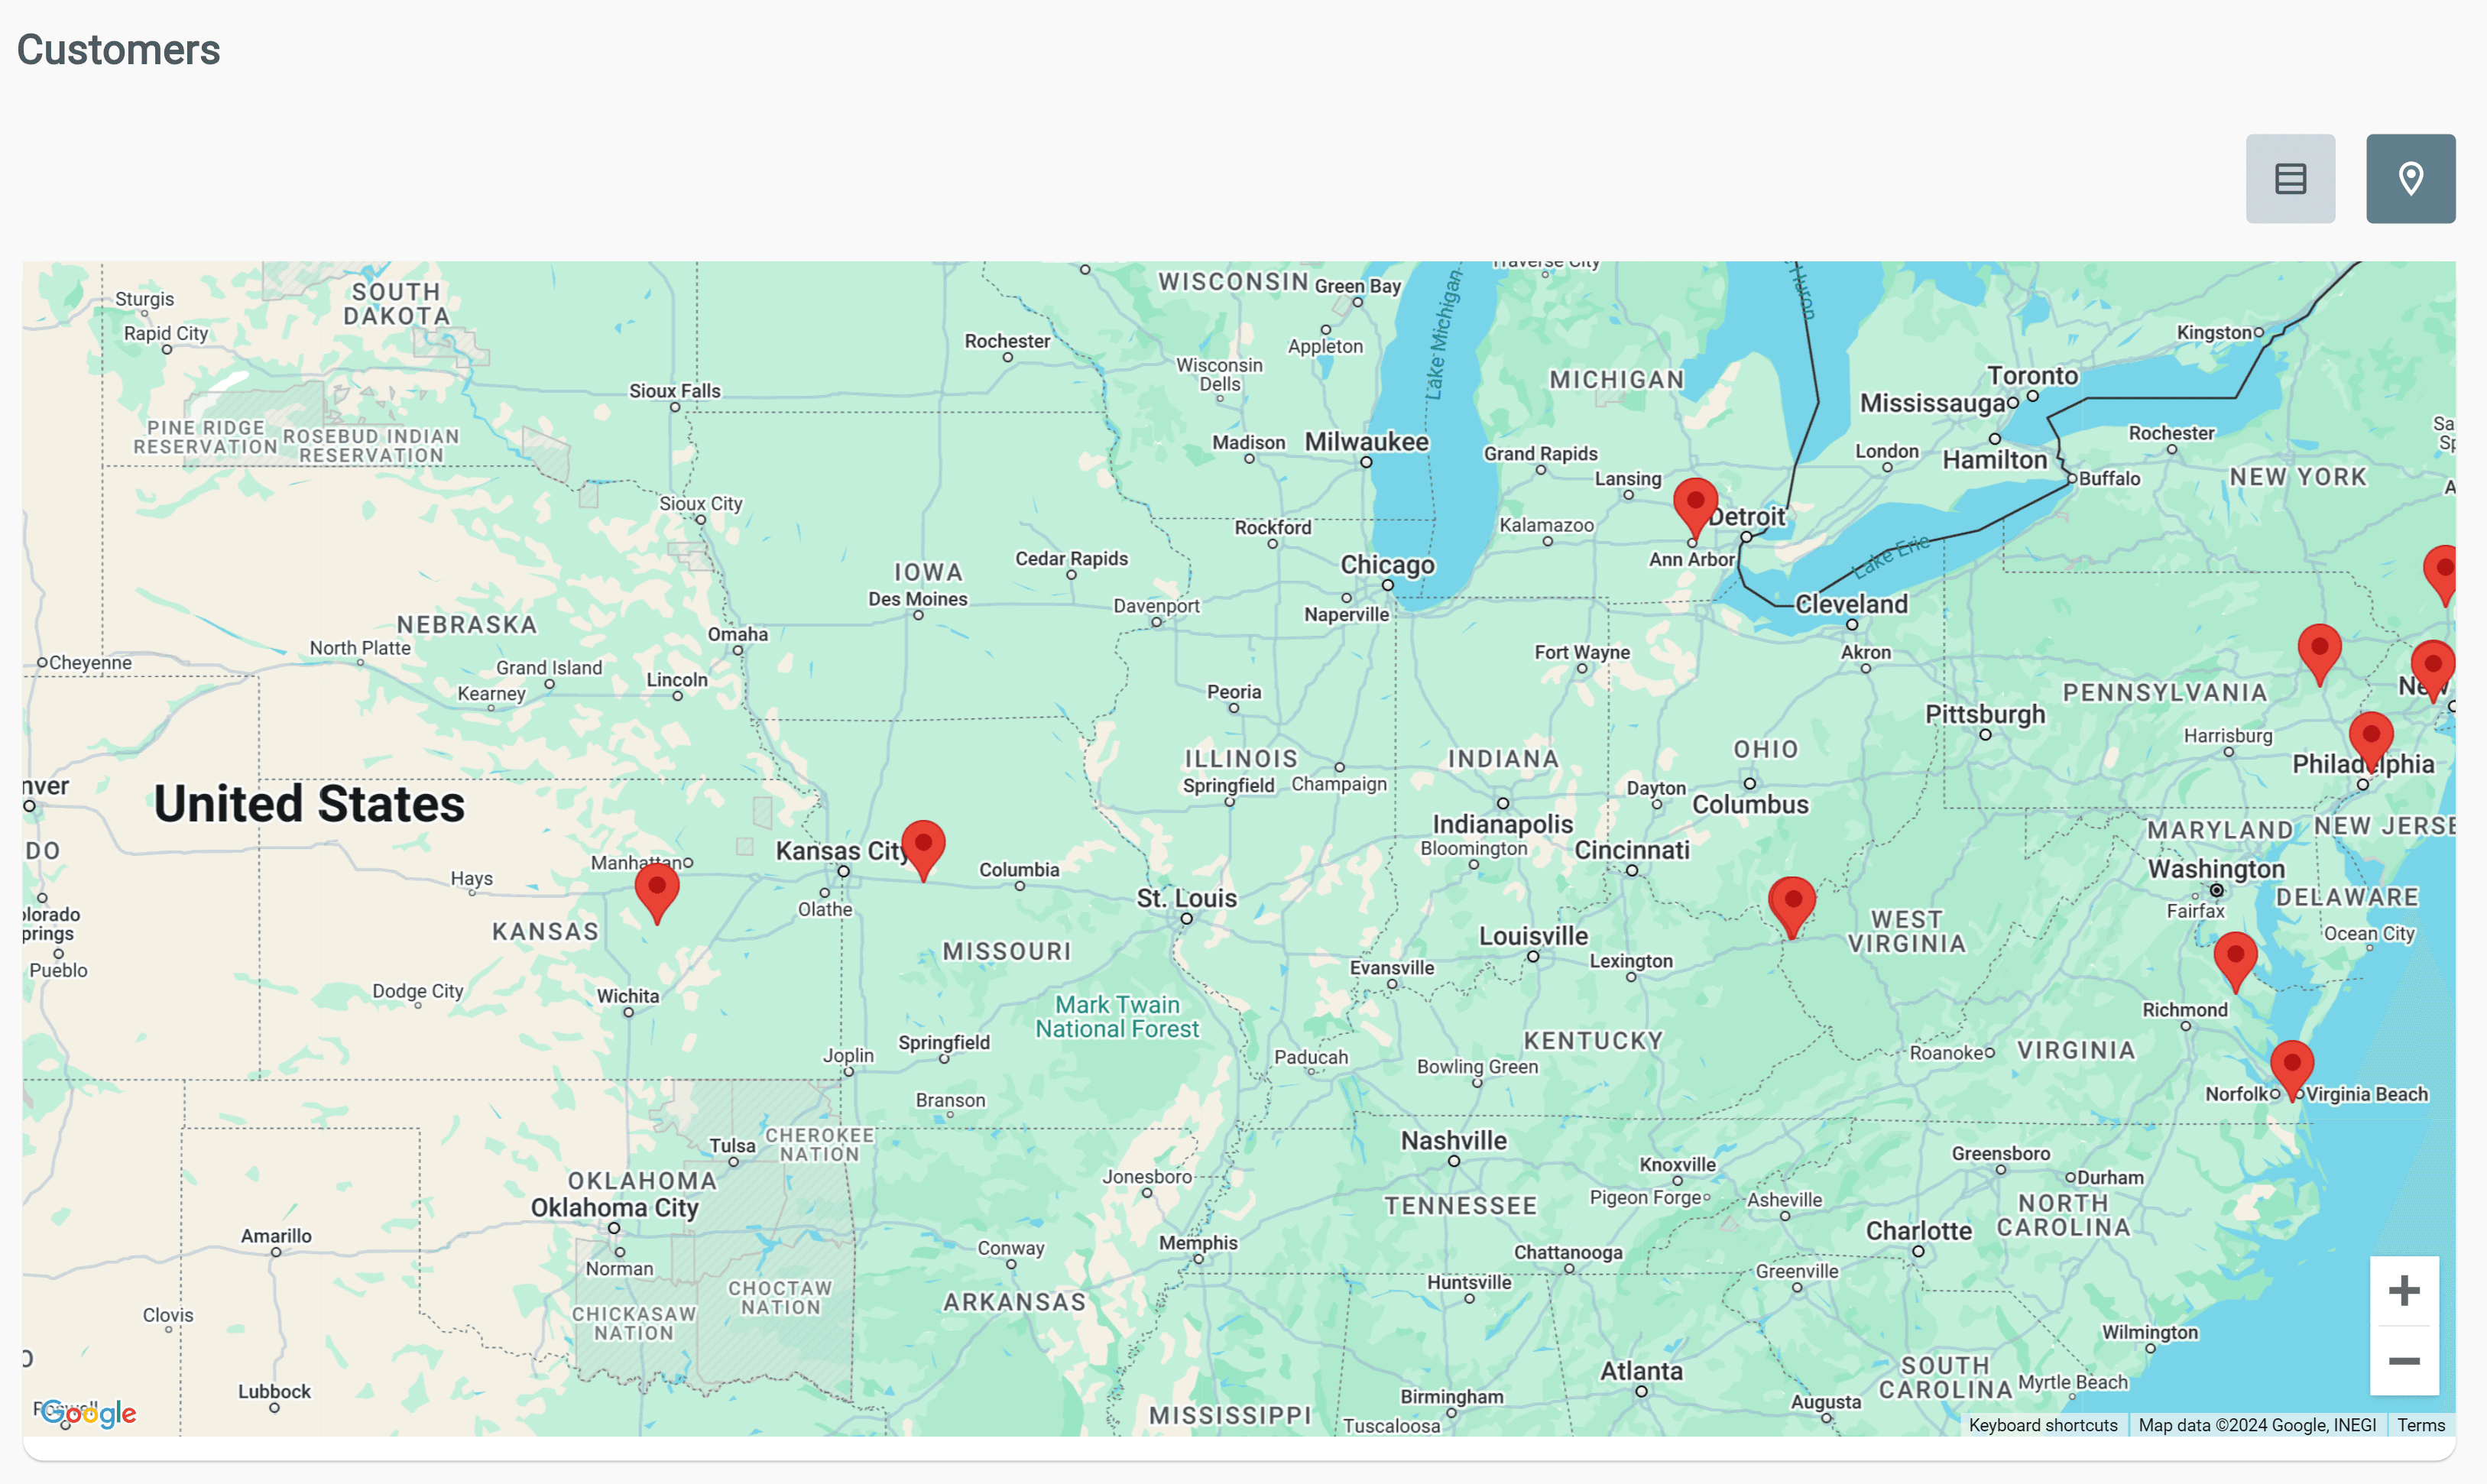
Viewing Customers on Map View
After selecting Customers in the menu > Find the Map View icon in the top right corner. Find and select location pin point to be brought to the selected individual Customer page.
Customer Information Usage
Overview
Customer information is used throughout Lexul Field Service to organize work orders, dashboards, contracts, and service records.
Customer records include:
- Name
- Shipping and billing addresses
- Contact information
- Phone number
- Active status
Where Customer Information Appears
Work Orders
When a work order is assigned to a customer, the following information appears at the top of the work order:
- Customer name
- Address
- Contact information
Dashboards
Customer names are displayed on:
- Kanban view.
- Table view.
- Map view.
The customer is linked to the related work order.
Contracts
Customers connected to recurring or duplication contracts appear in:
- The Contracts table.
- The work orders table within the contract.
Billing and Shipping Addresses
Lexul stores both:
- Billing address.
- Shipping address.
When using QuickBooks integration, both addresses sync from QuickBooks.
Customer Custom Fields
Custom fields added to customers appear in:
Customer → Details
Once added, customer custom fields will also appear on work orders assigned to that customer.
Lead vs. Customer
Customer records can be marked as either a Lead or an active customer.
To mark a customer as a lead:
- Go to Customers.
- Select the customer.
- Select Edit Customer.
- Turn on the Lead toggle.
- Save changes.
Lead customers will display a Lead label in the customer table.

Letters of Authorization
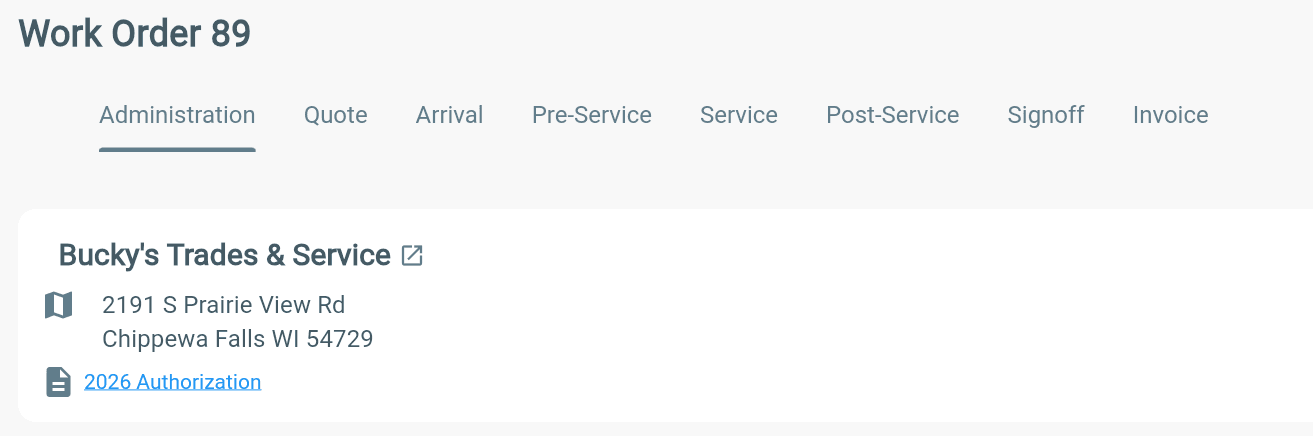
Letters of Authorization (LOA) can be added to customer records and linked to work orders. When selected, the LOA will display on the work order header card.
Adding Letters of Authorization
To add an LOA:
- Go to Customers.
- Select the customer.
- Find Letters of Authorization.
- Select Add LOA.
- Enter the LOA details and save.
Add LOA to a Work Order
When creating a work order:
- Select the customer.
- Choose the LOA from the LOA dropdown.
- Save the work order.
The selected LOA will appear on the work order header card.
Customer Deals
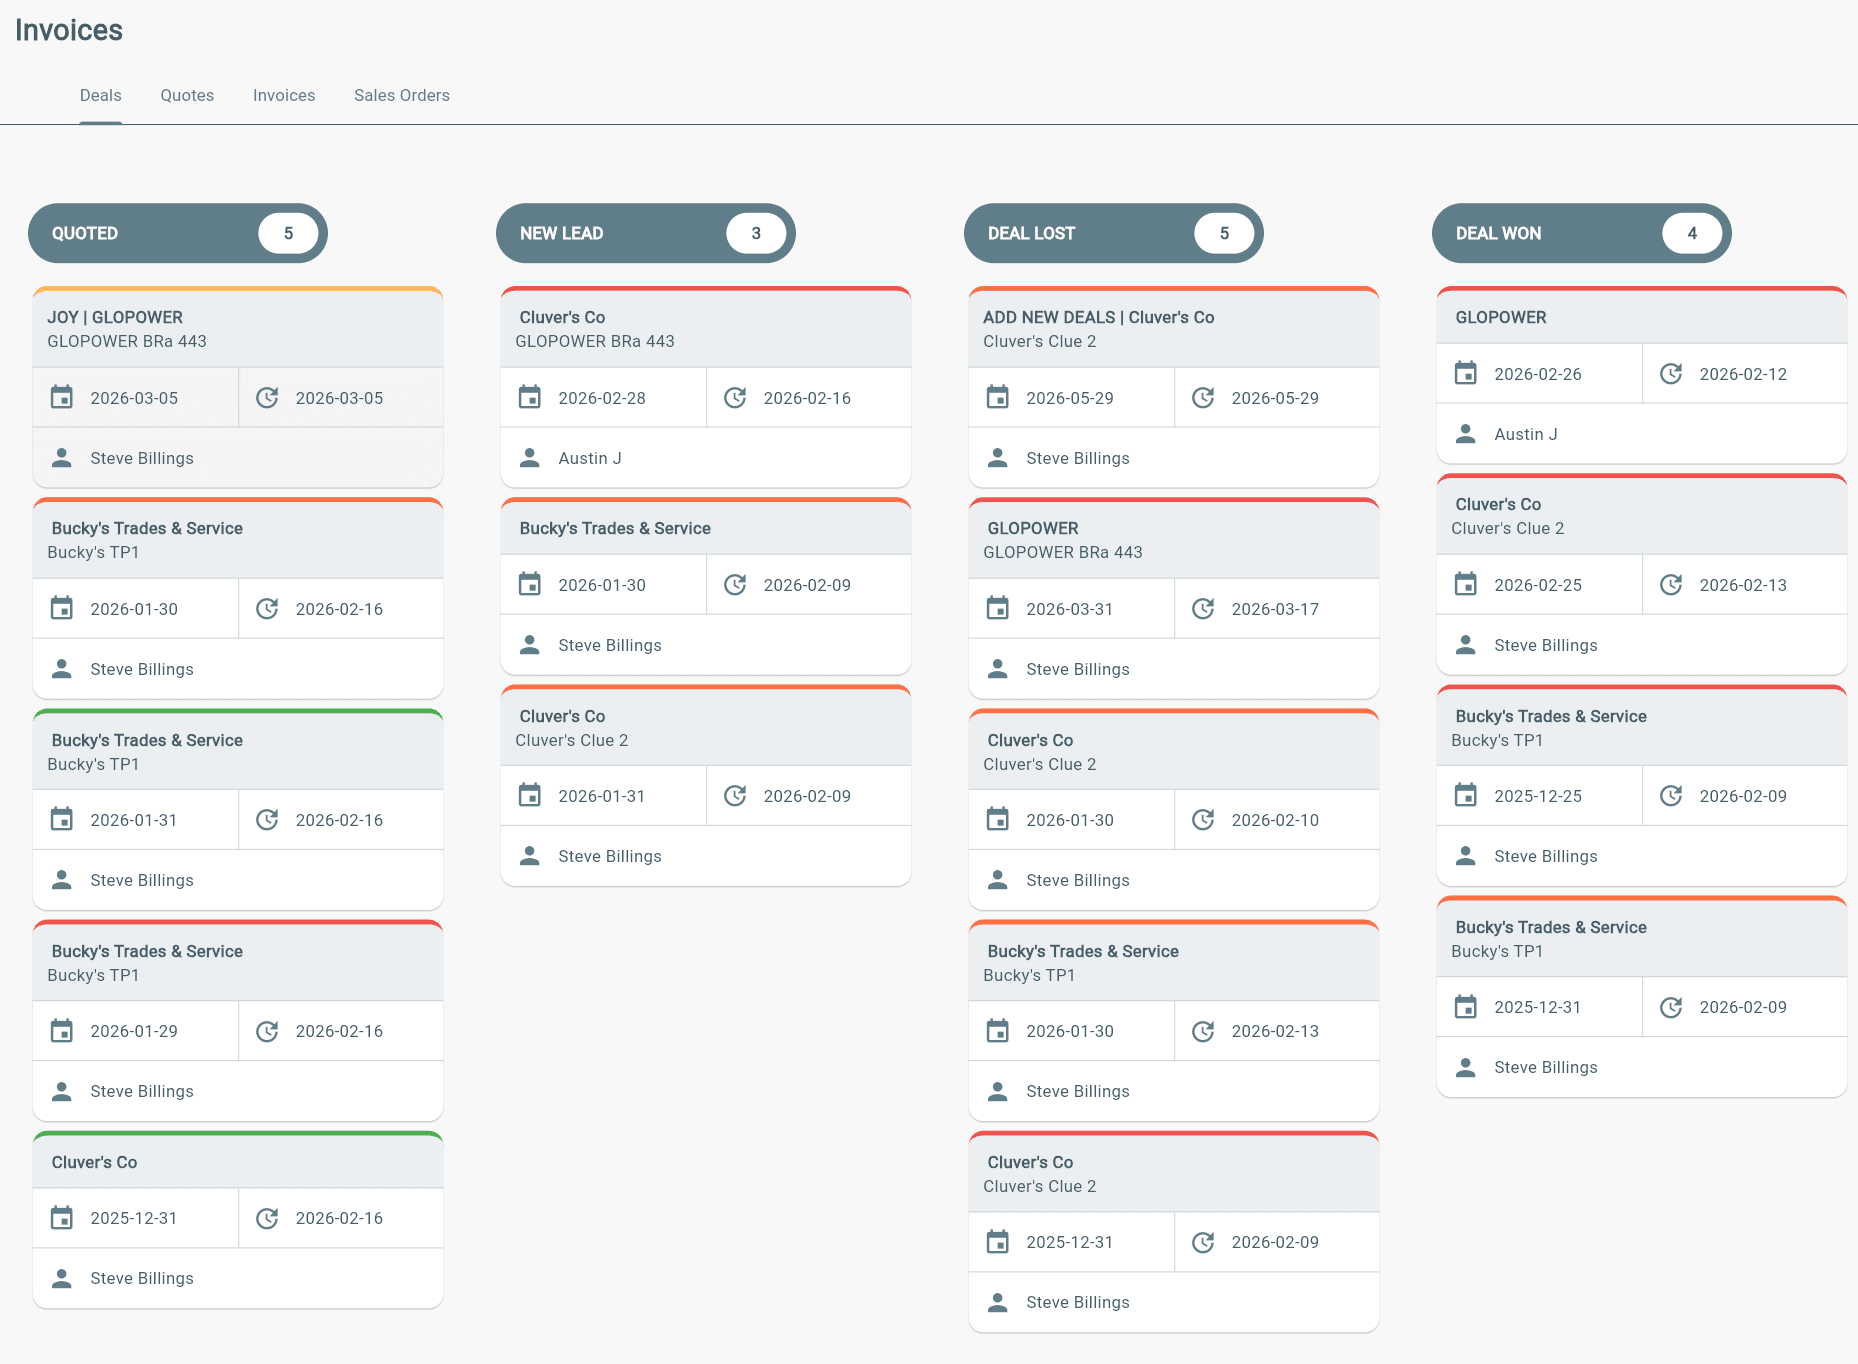
Deals help track potential customers, quotes, and sales opportunities.
Use Deals to:
- Track leads and prospects.
- Create and manage quotes.
- Track lead activity.
- Move opportunities through sales stages.
- Convert leads into new work and customers.
Access Deals
Go to:
Sales → Deals
Add Deal Stages
Deal Stages organize deals by status as they move through your sales process.
To add a new stage:
Configuration → Deal Stages → Add New
Create stages that match your workflow, such as:
- Lead
- Quote
- Approved
- New Work
- Customer
Additional Info
Customer Sync with QuickBooks
Customer syncing depends on the QuickBooks integration type.
QuickBooks Online
- New customers automatically sync to Lexul Field Service every few minutes.
QuickBooks Desktop
- Customers sync when you select Update.
- Sync timing can also be controlled by the Web Connector settings.
Customer Assets
Each customer can have their own assets, such as:
- Locations.
- Equipment.
- Other tracked customer items.
Assets can be assigned to work orders for service tracking.
View Customer Work Orders
To view work orders for a customer:
- Go to Customers.
- Select the customer.
- Open the Work Orders tab.
All work orders assigned to that customer will be listed there.